Driver Support
PiConsole USB Drivers are supported on:
- Windows XP, Windows Vista, Windows 7 and Windows 8 (i386 and AMD processors)
- OSX 10.4 (Tiger) or higher
If you have a different processor or OS, please e-mail us for help at: support (at) openelectrons (dot) com
|
Installation instructions for Windows 7
Login as Administrator
Download drivers and extract in a folder say: C:/download/drivers
Connect the device to your PC and look for Found New Hardware window to appear.
Under certain Windows 7 configurations, the Hardware Installation wizard does not appear, in that case,
While device is attached to your PC on USB port,
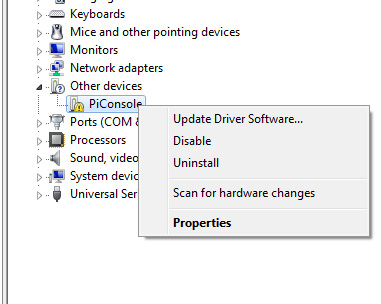
Right click on 'Computer' and run 'Properties'->Device Manager.
See where the device is listed, (t should be listed under Ports and USB devices).
Right click the entry and choose to 'install/update' it's driver.
In the Driver Installation window, select Locate and Install driver software (and give permission to continue).
Subsequently, select 'I don't have disc, show me more options...'
Then select the choice to 'Browse my computer ...' and select folder C:/download/drivers
Your computer may popup a window informing 'Cannot verify the publisher of this driver software...'
At this point choose 'Install this driver software anyway'
Follow the same steps for second driver installation.
|
Installation instructions for Windows 8
Follow the instructions for Windows 7.
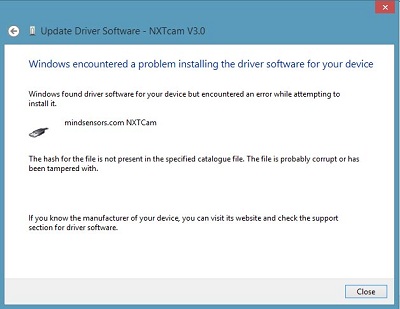
If your computer is configured with Driver Signature Enforcement, you will get an error message similar to adjacent picture.
If you do get an error, follow these steps to disable Driver Signature Enforcement and install the driver.
From the Metro Start Screen, open Settings (move your mouse to the bottom-right-corner of the screen and wait for the pop-out bar to appear, then click the Gear icon).
Click ‘More PC Settings’.
Click ‘General’.
Scroll down, and click ‘Restart now’ under ‘Advanced startup’.
Wait a bit.
Click ‘Troubleshoot’.
Click ‘Advanced Options’
Click ‘Windows Startup Settings’
Click Restart.
When your computer restarts, select ‘Disable driver signature enforcement‘ from the list.
Install the driver. Reboot again once the driver is installed.
|
Installation Instructions for Windows XP
Download USB Driver ZIP file to your disk and unzip in a folder, say c:/download/drivers
Connect device to USB Port of your PC.
The New Hardware Wizard will pop up, in this wizard, select:
(*) Install from a list or specific location.
Next, uncheck
[ ] Search removable media
and check
[x] Include this location to search.
Specify path of the subfolder. e.g. c:/download/drivers
In the next step, a dialog may inform you that the driver has not passes the Windows Logo test for compatibility.
Select 'Continue Anyway'.
Files Needed Dialog box:
In the next step, if a dialog box appears asking for path of sys files, provide the path you gave in prior step followed by i386. (or directory for your processor)
e.g. c:/download/drivers/i386
When the New Hardware Wizard pops up again, follow the same steps.
The device is ready to use upon completion of these steps.
|
Installation instructions for Windows Vista
Login as Administrator
Download drivers and extract in a folder say: C:/download/drivers
Connect camera and look for Found New Hardware window to appear.
In this window, select Locate and Install driver software (and give permission to continue).
Subsequently, select 'I don't have disc, show me more options...'
Then select the choice to 'Browse my computer ...' and select folder C:/download/drivers
Vista may popup a window informing 'Cannot verify the publisher of this driver software...'
At this point choose 'Install this driver software anyway'
Follow the same steps for second driver installation.
|
Installation Instructions for Mac
For Macintosh, download the following file: PiConsole Mac USB Drivers
Unzip this file on your mac, and install using Installer and follow the on-screen instructions to complete installation.
Attach device to your Mac on a USB port.
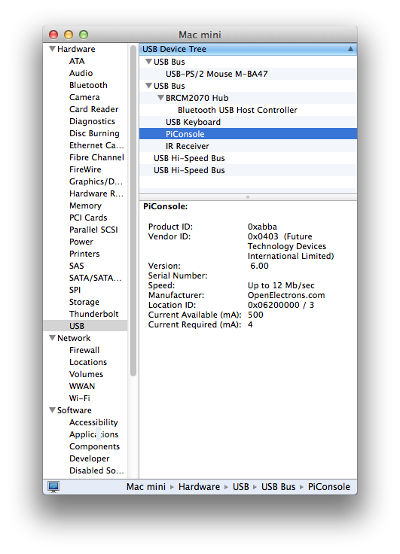
Launch the System Profiler utility. This can be accessed by going to the Finder and selecting Applications from the Go menu, then open the
Utilities folder.
Select USB under Hardware in the panel to the left and Look for the device in the USB Device Tree.
Also, when the device is installed properly, you will see following entries in the /dev directory:
/dev/cu.PiConsole-xxxxxxxx
/dev/tty.PiConsole-xxxxxxxx
where xxxxxxxx is the serial number of your device.
To connect to console, Open Terminal, and use command as:
$ screen /dev/tty.PiConsole.xxxxxxxx
Here is an AppleScript submitted by Mac user:
 tell application "Terminal"
     do script with command "screen /dev/tty.PiConsole-00201124"
     set number of rows of window 1 to 40
     set number of columns of window 1 to 80
     set background color of window 1 to "black"
     set normal text color of window 1 to "orange"
     set custom title of window 1 to "Raspberry Pi"
end tell |
Tips for using on Linux (via USB)
To use PiConsole on Linux, you will have configure and install USB drivers for your Linux operating system.
To configure USB, we use FTDI chip with manufacturer ID as 0x0403, and
Device ID as 0xABBA.
|
|

