Connecting Pi-Light to Raspberry Pi directly
Introduction
Things you will need
- Raspberry Pi (Get one here)
- Pi-Light (Get one here)
- I2C Access Point Board (Get one here)
Setting Up and Testing
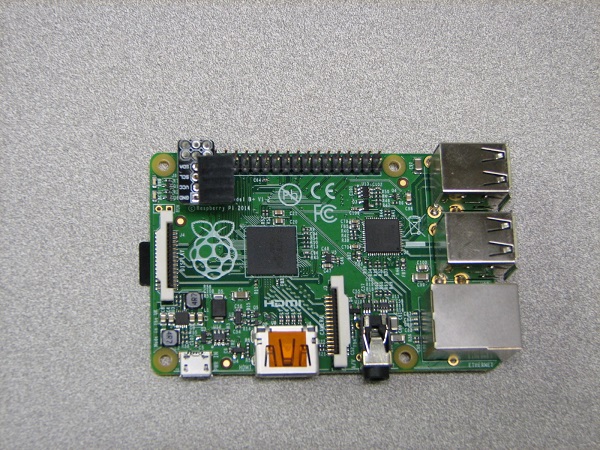
First you will need connect the I2C Access Point Board to the GPIO pins as the picture shows below.
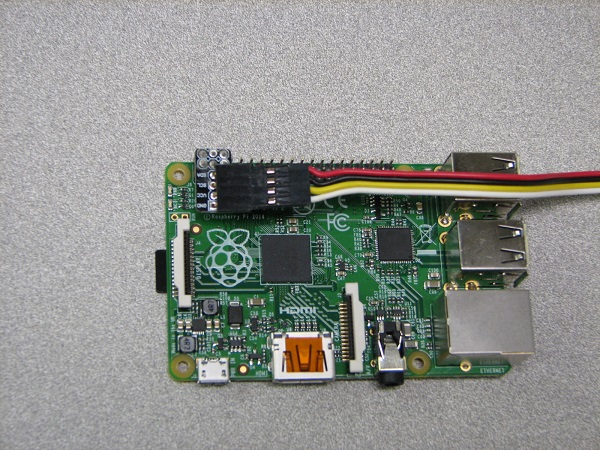
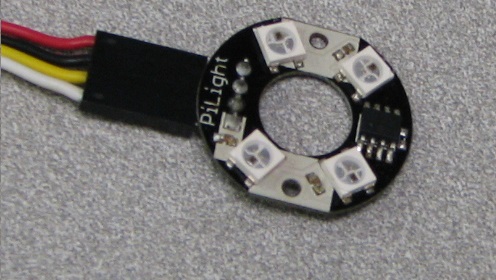
Connect the Pi-Light to the I2C Access Point Board using an I2C cable. Ensure the GND pin on the I2C Access Point Board is connected to the first pin on Pi-Light connector which has a white square background. Look at the picture shown below.
You will now need to download the appropriate software for your Raspberry Pi, so from your Raspberry Pi issue the command.
sudo wget /largefiles/pi-pan-2015-Jessie.tar.gz
tar -zxvf pi-pan-2015-Jessie.tar.gz
This will download and unzip the the correct files, now you will have to navigate to the correct folder and install the Pi-Light software by issuing the following command.
cd pi-pan
sudo ./install-pilight.bash
After installing the Pi-Light files you will have to restart the RaspberryPi
sudo reboot
Next check the Pi-Light by running the check-pilight.py program, but first you will have to navigate to the pi-pan folder.
cd pi-pan
python check-pilight.py
This will flash the Pilight with white, red, green, blue, white. If nothing lights on the Pi-Light check the connectivity and try again.
Programming Pi-Light with Python
After you have downloaded and installed the Pi-Light files, you can begin to write your own program. Fist you must import the pilight program with
import pilight
Next you will need to set Pilight to a variable along with red, green, and blue to variables in the example we use this line of code
pl = pilight.PILIGHT()
red = 0
green = 0
blue = 125
Finally you must set the color for the Pi-Light using the following command
pl.createPiLight(red, green, blue)
with red, green, and blue numeric values between 0-255. 0 being no intensity and 255 being highest intensity.
View my example code here.

