
How To Use SD540
This blog is written for users of all experience levels. Advanced users may find some of this information useless and/or redundant. The SD540 is intended for use with Labview 2014 or later with the 2015 or later FRC Update. The FRC Driver Station must also be installed for use with this example.
Software Installation
Download the example program and software.
Unzip the SD Motor Control.zip file.
Open the unzipped 'SD Motor Control' folder.
Navigate to the 'SD540 files' folder.
Copy WPI_Motor ControlOpen.vi and WPI_Motor ControlOpen SD540.vi to
'National Instruments/Labview 2014/vi.libRock Robotics/WPI/Motor Control'.
The National Instruments directory is usually found in Program Files.
Copy NetComm_UsageReport_ResourceType.ctl to 'National Instruments/Labview 2014/vi.liv/Rock Robotics/SystemInterfaces/NetworkCommunication'.
The software is now installed and you are ready to run the example.
Connecting the SD540

Attach 12 gauge or larger wires to 4 screw terminals of the SD540.
With power switched off, attach the wires on the side labeled with a battery to your 12V power supply.
It is best to use a switch between any device connected directly to a battery or power supply to avoid sparks or voltage spikes.
Be sure to pay close attention to polarity when connecting the SD540.
Attach the wires on the side labeled with an 'M' in a circle with your motor.
Polarity will make make a difference in the direction the motor turns.
Connect the PWM cable to PWM 1 of the RoboRIO and the top left 3 pins of the SD540. Ground wire should be to the far left.
Pay close attention to polarity. The pins are labeled on the bottom of the SD540.
Apply Power to your system.
SD540 is now connected and ready for instructions.
SD540 Motor Control Example
Connect the RoboRIO to your PC via USB or through your network.
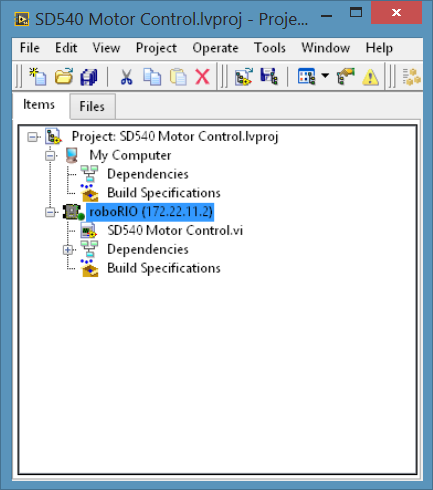
Open the SD540 Motor Control.lvprojb example in the Labview environment.
This example was wirtten with RoboRIO attached via USB. You will have to set the target to match your device.
Right-click the Target and select 'Connect'.
Open the SD540 Motor Control.vi fro the project explorer window.
If this file is not visible, click the '+' icon to the left of the target.

Deploy the code to the RoboRIO by left-clicking the white arrow in the top left of the window.
Click 'OK' for any messages.
Open the FRC Driver Station.
Connect your RoboRIO.
Select 'TeleOp' mode and left-clcik 'Enable'.
Use the Slider in the Labview front panel to change the PWM signal.
You should see your motor moving.
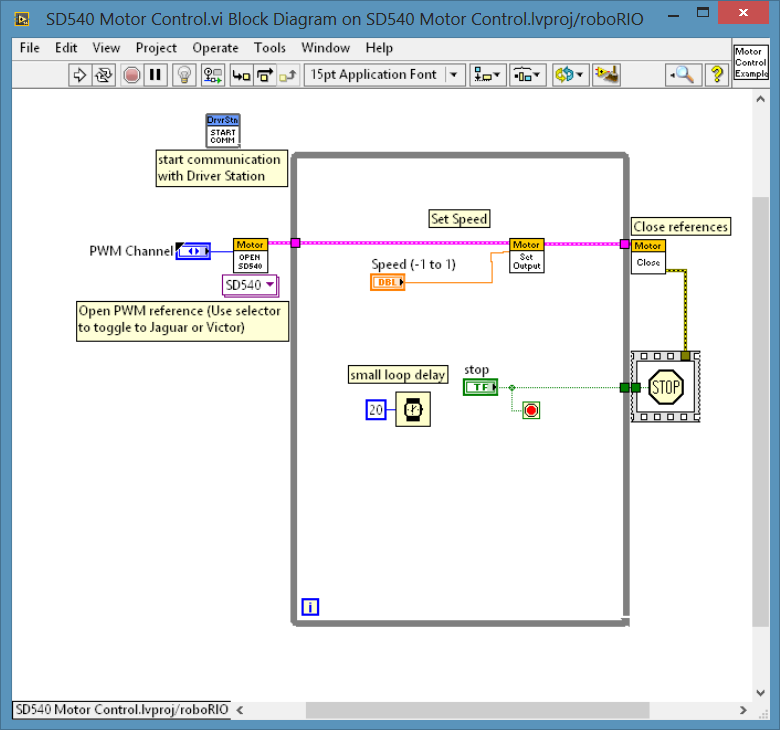
The Block Diagram is provided below.