Keeping plants healthy isn’t just about giving them water — it’s about giving them the right amount at the right...
Latest posts
-
 How to Measure Soil Moisture and Use It in Automatic Plant Watering Systemsread more
 -
 USB Driver installation instructions for NXTCam-v5read more
USB Driver installation instructions for NXTCam-v5
-
 How to attach rechargeable battery to PiStormsread more
How to attach rechargeable battery to PiStorms
-
 Connect to Wi-Fi Directly from PiStorms!read more
Connect your Raspberry Pi to a Wi-Fi network directly from PiStorms!
-
 Image Recognition Robot with PiStorms and Pi Cameraread more
Image Recognition Robot with PiStorms and Pi Camera
-

-
 Rotary Inverted Pendulum with PF-XL Motor and GlideWheel-Mread more
Rotary Inverted Pendulum with PF-XL Motor and GlideWheel-M
-

-
 Make Your Own Obstacle Avoidance Robot with SumoEyesread more
Make Your Own Obstacle Avoidance Robot with SumoEyes
-

Blog categories
Search in blog

Line Following Robot with LightSensorArray or LineLeader
Tri-Bot
Instructions can be found at http://www.vmg.vil.ee/Robootika/Lego9695/9695_Tribot100.pdf
- Build Tri-bot
- Remove Lego touch sensor and claws
- Instructions can be found here.
Parts
All part names correspond to those found at http://brickset.com/inventories/8547-1
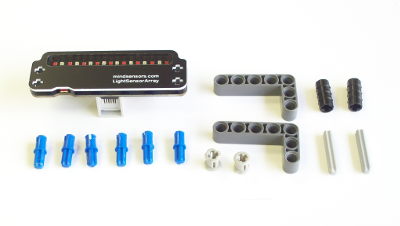
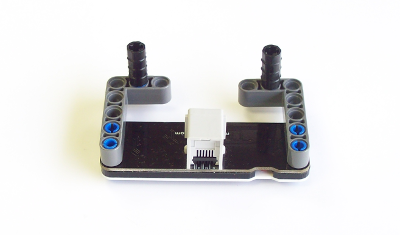
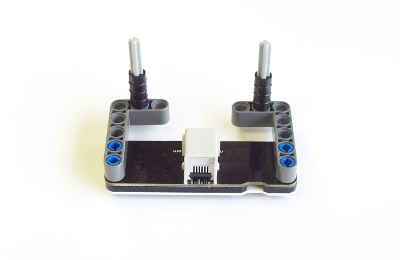
- 1 - LightSensorArray or LineLeader(red casing)
- 2 - cross axle 3M
- 2 - bush for cross axle
- 2 - cross axle, extension, 2M
- 2 - technic angular beam 3X5, 90 degrees
- 6 - connector bushing w. friction/crossaxle
Step 1
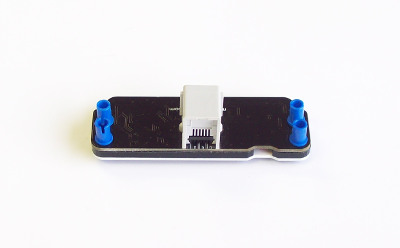
- Insert 4 connector bushing w. friction/crossaxle into cross holes of the LightSensorArray or LineLeader.
Step 2
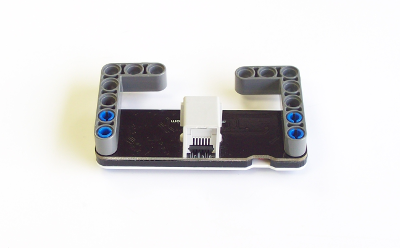
- Connect the 2 technic angular beam 3X5, 90 degrees onto the exposed 4 connector bushing w. friction/crossale.
Step 3
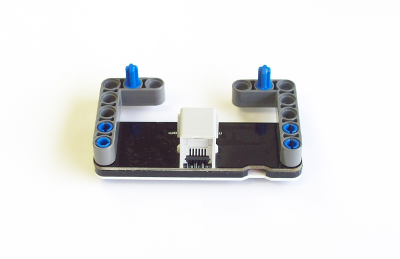
- Insert the remaining connector bushing w. friction/crossaxle into the middle holes of the technic angular beam 3X5, 90 degrees of the 3 holed side.
Step 4
- Place cross axle, extension, 2M onto the connector bushing w. friction/crossaxle.
Step 5
- Insert cross axle 3M into the cross axle, extension, 2M.
Step 6

- Place bush for cross axle onto the cross axle 3M.
Step 7

- Insert the unconnected end of each cross axle 3M into the bottom of the cross axle holes on the very front of the robot
Connections
- Connect LightSensorArray to sensor port 1 of the NXT brick using NXT cable.
- Make sure right motor is connected to port B, and left motor is connected to port C.
Programming
Program for LightSensorArray can be found here.
Program for LineLeader can be found here.
No LEGO sensors are used with this program and are not required for bot function.
- Make sure LightSensorArray or LineLeader block is downloaded and imported into your programming environment.
- Download the EV3 sample program for the respective sensor.
- Open the example project and download it to the brick.
Running Tri-Bot
- Make sure LightSensorArray or LineLeader is properly calibrated.
- Place bot at the start of the line you wish to follow.
- Run the LineFollower program on the brick for the correct device.
Related posts
-
 Line Following Robot with LightSensorArray or LineLeader
read more
Line Following Robot with LightSensorArray or LineLeader
Line Following Robot with LightSensorArray or LineLeaderread more -
 Attach Mulitple Sensors to a Single EV3 Port
EV3 Sensor Adapter with SPLIT-Nxread more
Attach Mulitple Sensors to a Single EV3 Port
EV3 Sensor Adapter with SPLIT-Nxread more -
 Line Tracking Experiments with NXTCam
read more
Line Tracking Experiments with NXTCam
Line Tracking Experiments with NXTCamread more -
 Vision for your PiStorms Robot using Pi Camera!
read more
Vision for your PiStorms Robot using Pi Camera!
Vision for your PiStorms Robot using Pi Camera!read more -
 How to install OpenCV on Raspberry Pi and do Face Tracking
read more
How to install OpenCV on Raspberry Pi and do Face Tracking
How to install OpenCV on Raspberry Pi and do Face Trackingread more
Leave a comment