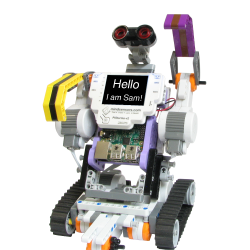

My Loyal PyDog Companion
Python Program
Using the PiStorms libraries I was able to use the Mindsensors NXT-SumoEyes with the PiStorms, to give PyDog a physical detection system. So when PyDog sees someone on the left or right, it will turn till that person/object is directly infront of PyDog. Once the NXT-SumoEyes read that there is something in front of it, it begins to wag its tail, shake its body and bark. This works because you will be constantly reading from the NXT-SumoEyes and you should receive the following values
If the value you receive is about 130, the Nxt-SumoEyes see nothing.
If the value you receive is about 47, the Nxt-SumoEyes see something on its left side.If the value you receive is about 57, the Nxt-SumoEyes see something on its right side.
If the value you receive is about 213, the Nxt-SumoEyes see something directly in front.
You can download the example program HERE.
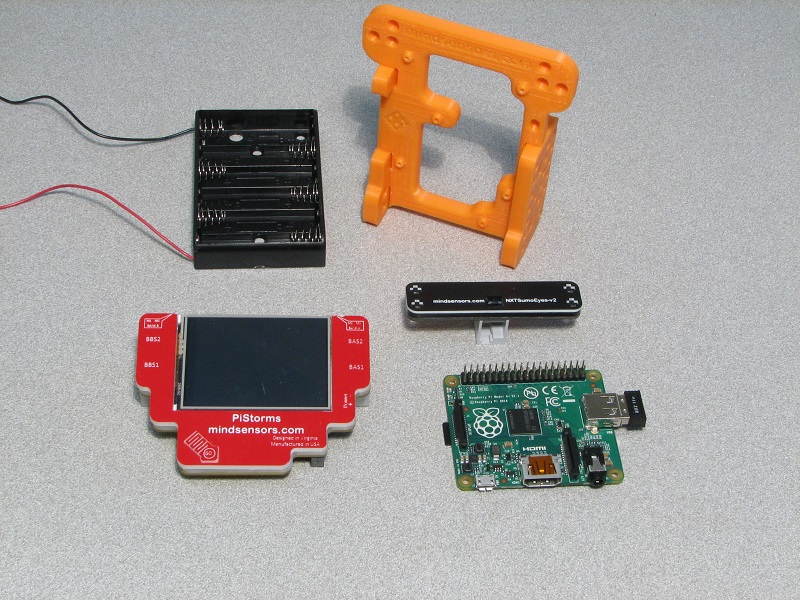
Parts List
PiStorms
PiStorms Frame
Raspberry Pi A, B or B+
Battery Box -6 AA
NXT-SumoEyes
Ball Caster
Mounting screws (4)
Bendable paper clip
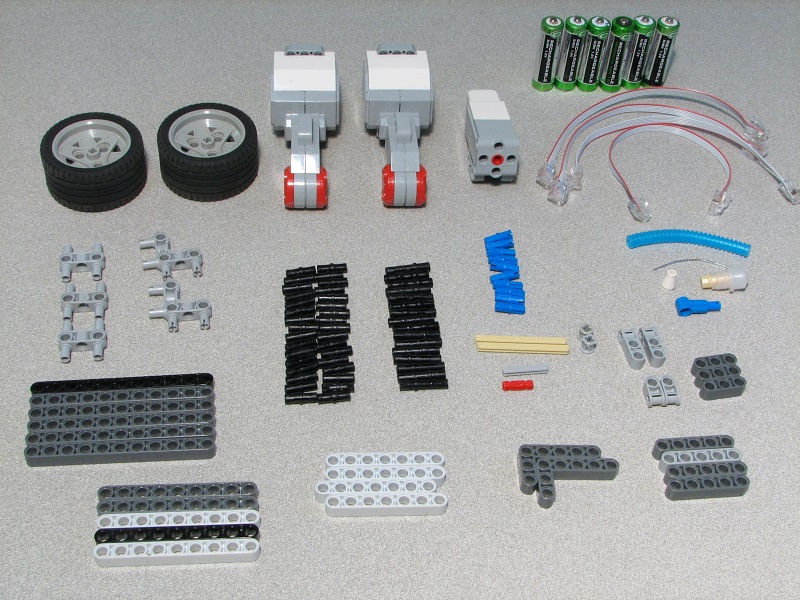
Lego Parts List
All part numbers are corresponding to peeron.com
2x 'Technic Beam 3 x 5 Bent 90' (32526)
1x 'Technic Axle 2 Notched' (32062)
2x 'Technic Axle 6' (3706)
1x 'Technic Axle 3' (4519)
2x 'Technic Axle joiner Perpendicular' (6536)
2x 'Technic Axle Joiner Perpendicular with 2 Holes' (42003)
1x 'Technic Angle Connector #1' (32013)
6x 'Technic Beam 11' (32525)
5x 'Technic Beam 9' (40490)
4x 'Technic Beam 7' (32524)
4x 'Technic Beam 5' (32316)
3x 'Technic Beam 3' (32523)
37x 'Technic Pin with Friction and Slots' (2780)
14x 'Technic Pin Long with Friction' (6558)
11x 'Technic Axle Pin with Friction' (43093)
2x 'Technic Bush' (3713)
3x 'Technic Axle Joiner Perpendicular 3L with 4 Pins' (48989)
2x 'Technic Beam 3 x 3 Bend with Pins' (55615)
1x 'Cone 1 x 1' (4589)
1x 'Technic Ribbed Hose' (78)
2x 'Tyre RC Buggy 56 x 28 ZR Street' (41897)
2x 'Wheel RC Race Buggy' (41896)
4x ' Electric Minstorms NXT Cable 20cm' (55804)
1x 'Electric Motor Medium EV3' (99455)
2x 'Electric Motor Large EV3' (45502)
How to Build:
PyDog
Step 1: Assemble the PiStorms frame.
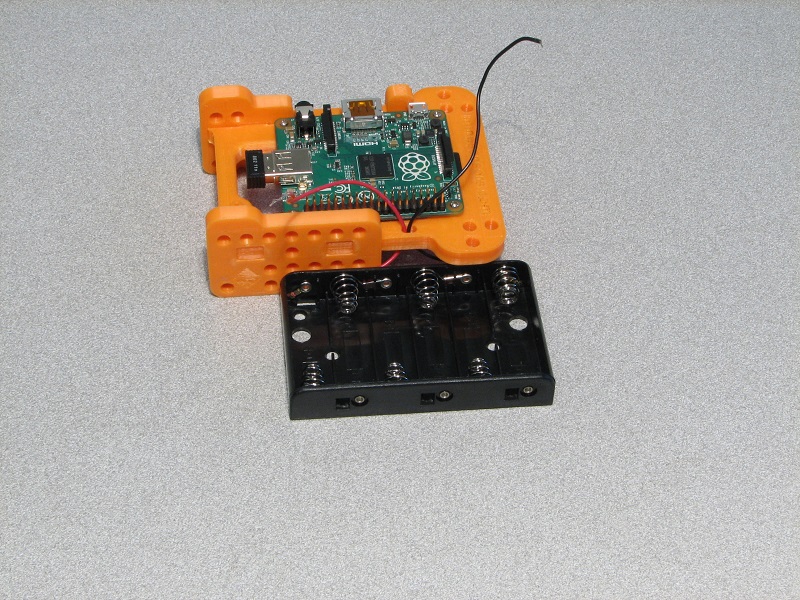
Step 2: Screw Raspberry Pi to the PiStorms frame.
Step 3: Feed the batter box power wires through the PiStorms frame.
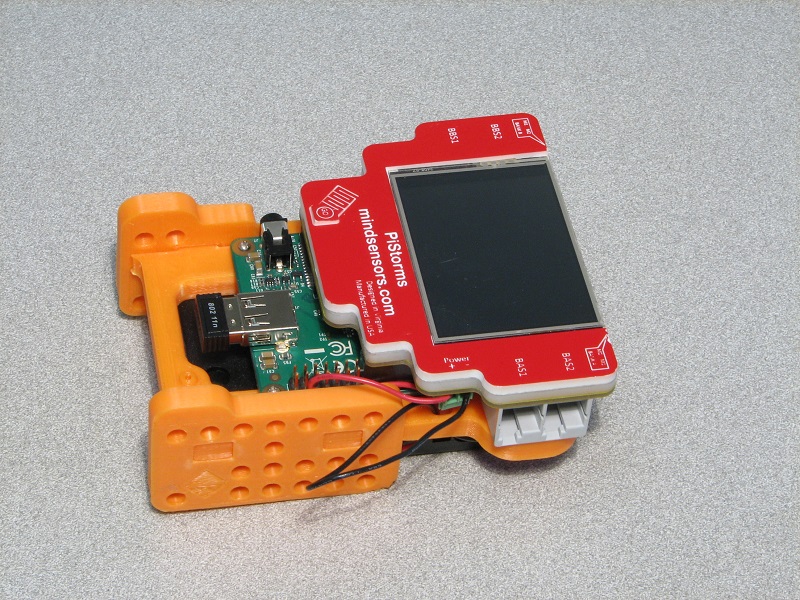
Step 4: Screw power wires into the PiStorms
Step 5: Slip battery box in between place holders on bottom of PiStorms frame and attach Pistorms to Raspberry Pi using GPIO pins.
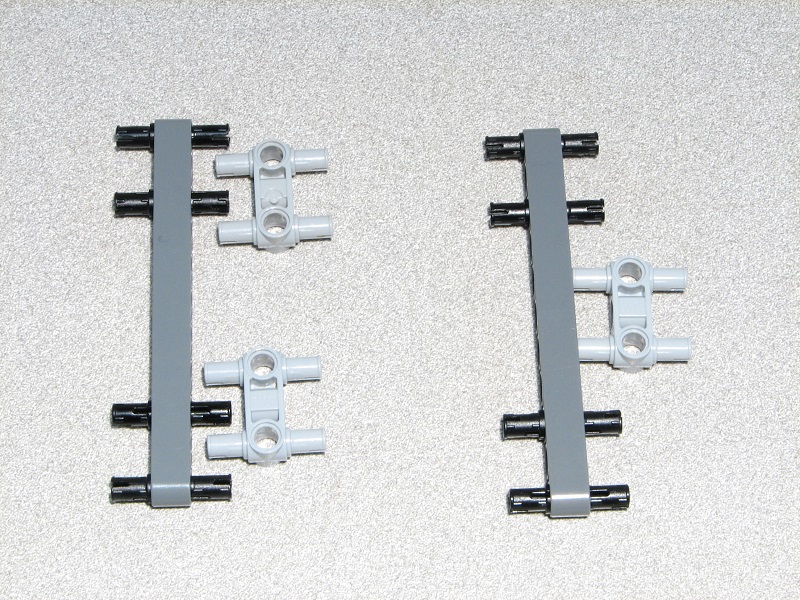
Step 6: Create the two pieces shown above using 2x 'Technic Beam 11' and 8x 'Technic Pin Long with Friction'.
Step 7: Insert the 3x 'Technic Axle Joiner Perpendicular 3L with 4 Pins' as shown in the picture.
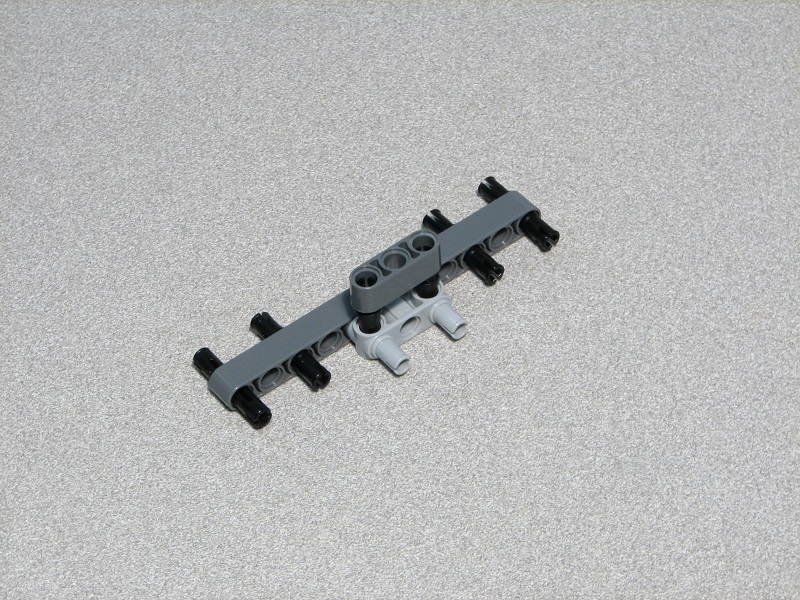
Step 8: On the beam with 1, 'Technic Axle Joiner Perpendicular 3L with 4 Pins' place a 'Technic Beam 3' on top of the 'Technic Axle Joiner Perpendicular 3L with 4 Pins' as shown in the picture with 2x 'Technic Pin with Friction and Slots'.
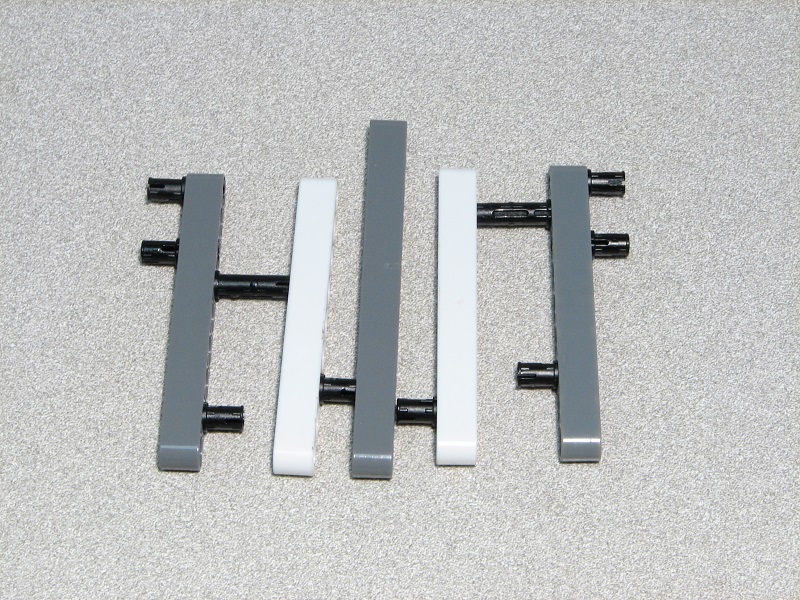
Step 9: You will need 8x 'Technic Pin with Friction and Slots', 2x 'Technic Pin Long with Friction', 4x 'Technic Beam 9', and 1x 'Technic Beam 11'.
Step 10: Arrange the Beams as shown in the picture above and push together.
(After pushing the beams together it should look something like this picture above.)
Step 11: using a 'Technic Beam 7' and 2x 'Technic Beam 3 x 3 Bend with Pins', place the pieces on the beam to make a "U" shape as shown in the picture.
Step 12: With x3 'Technic Beam 7', make another "U" shape by connecting them as shown in the picture using x2 'Technic Pin with Friction'
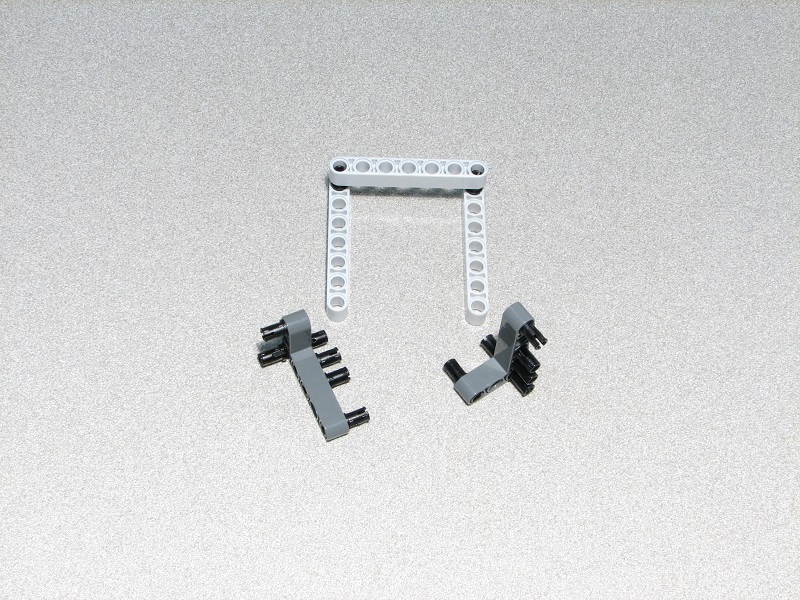
Step 13: Now with 2x 'Technic Beam 3 x 5 Bent 90', 2x 'Technic Pin long with Friction' and 8x 'Technic Pin with Friction'. create the figure in the Picture above (use the 'Technic Pin long with Friction' on the corner of the pieces).

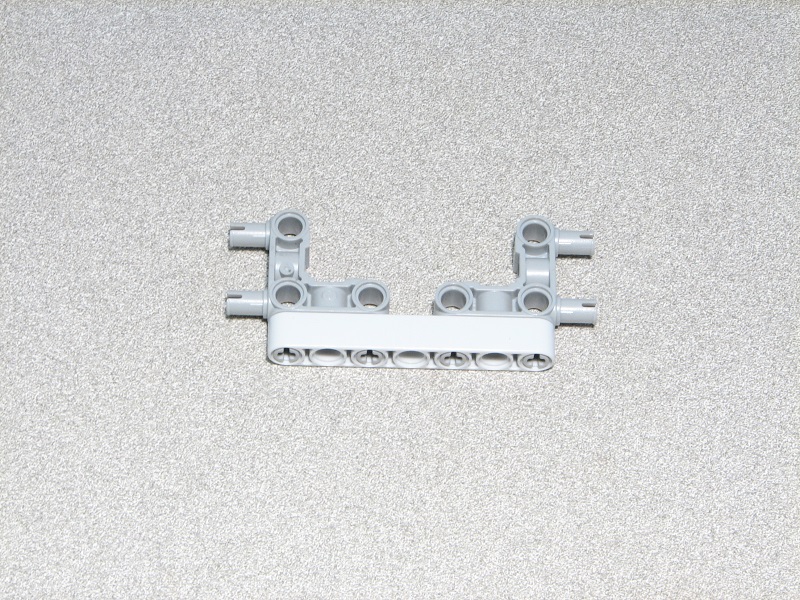
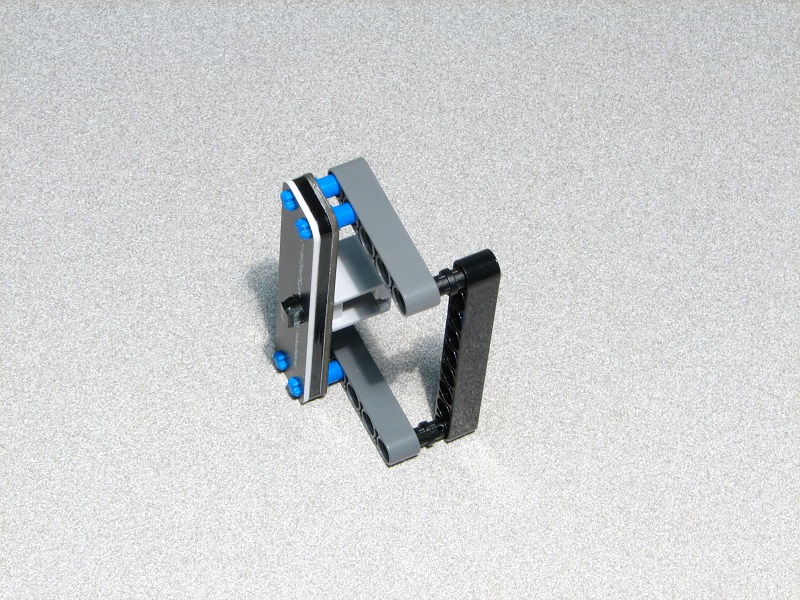
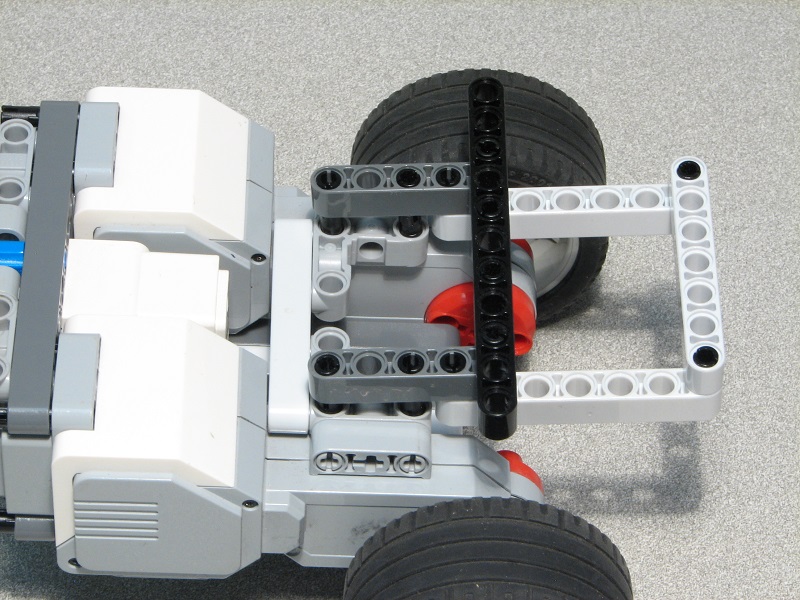
Step 14: Now place the 'Technic Beam 3 x 5 Bent 90' on the Beams as shown above and place another 'Technic Beam 11' on top evenly.
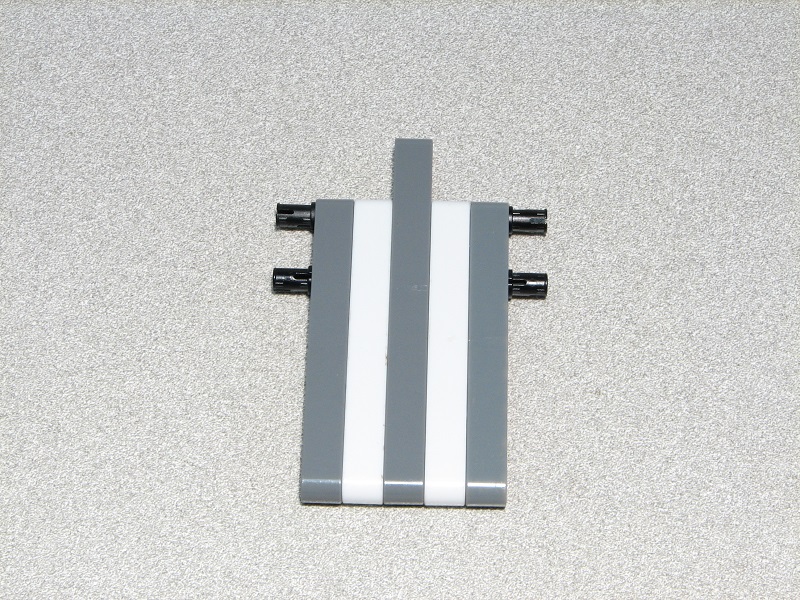
Step 15: Now place 4x 'Technic Axle Pin with Friction' in the NXT-SumoEyes. Place 2x "Technic Beam 5' on both side as picture describes and then place 'Technic Beam 9' across the other two beams with 2x 'Technic Pin Long with Friction'.
Step 16: Using 2x 'Technic Beam 5', 2x 'Technic Beam 3', 6x 'Technic Pin with Friction', and 2x 'Technic Pin Long with Friction' arrange the beams as shown in picture above and push together.

(After pushing beams together should look like the picture shown above)
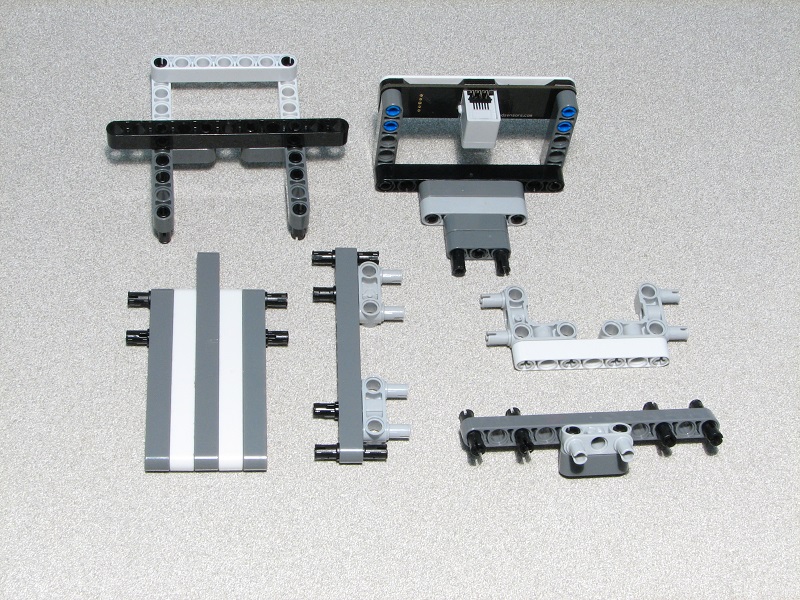
You should now have 6 main Lego pieces like picture shown above.

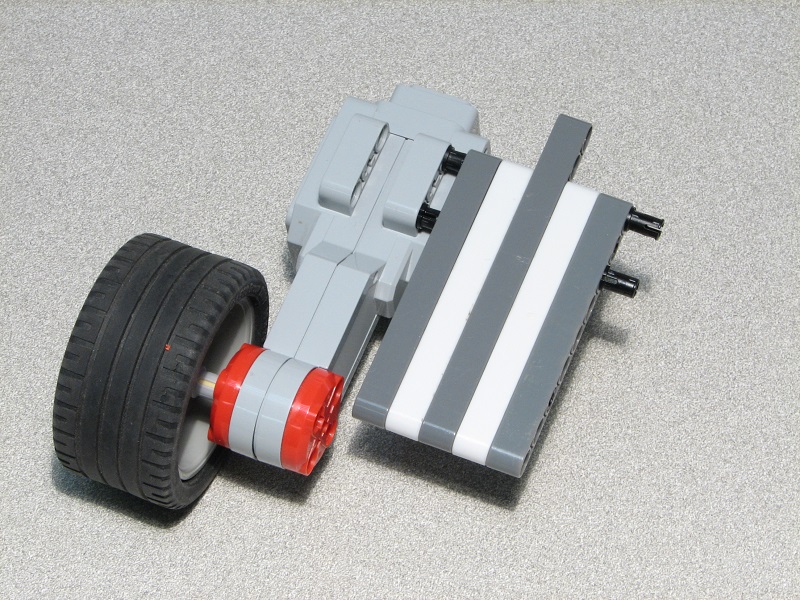
Step 17: Next you will prepare the Large EV3 motors by placing the 'Technic Axle 6' at the center of the Motor tip. slide on a 'Technic Bush' then the wheels the motors should look similar to the picture shown above.
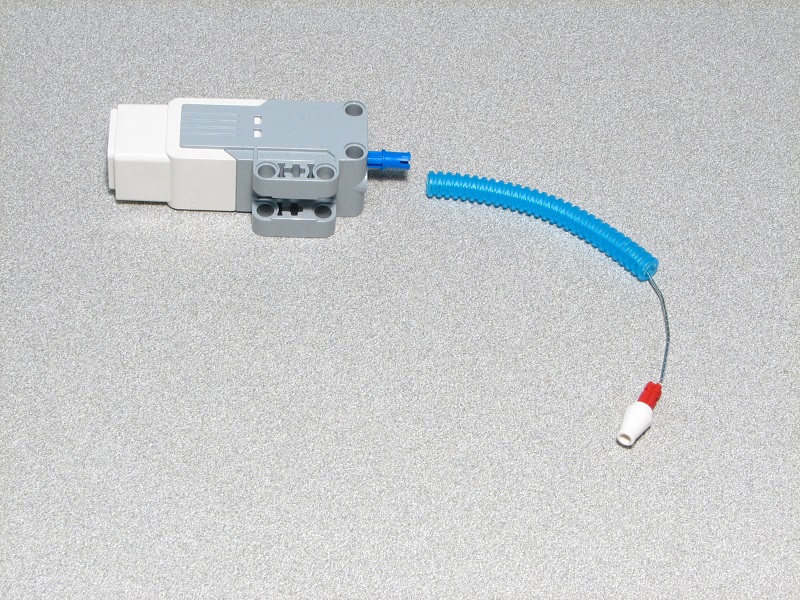
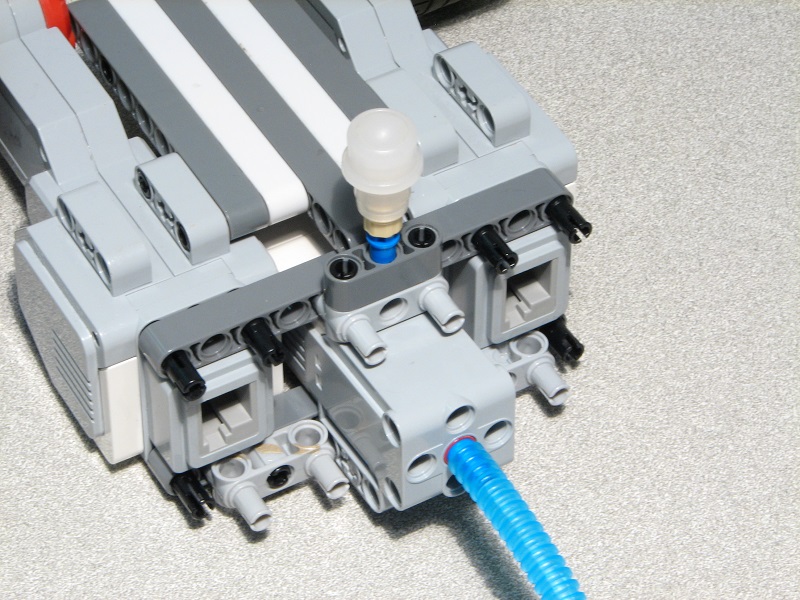
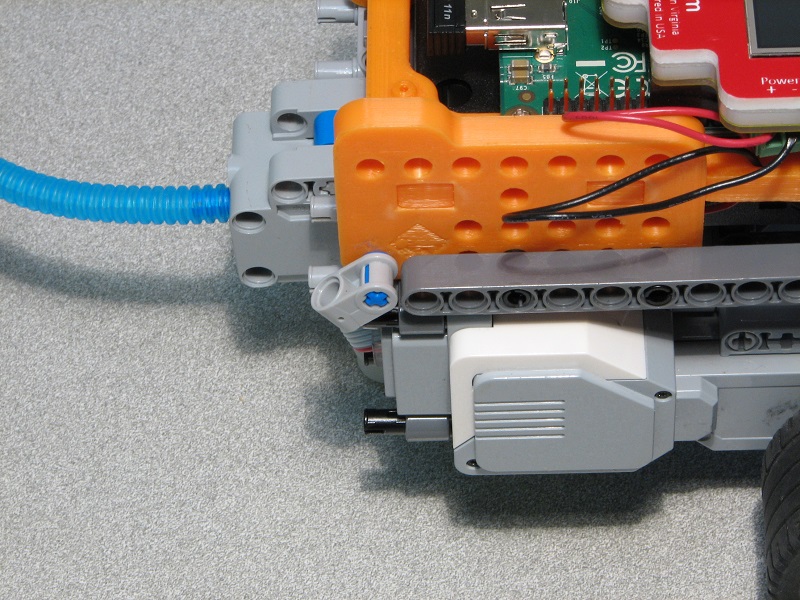
Step 18: Prepare the Medium EV3 motor, place a 'Technic Axle Pin with Friction' in the center axle. Place the 'Technic Axle 2 Notched' inside of the 'Cone 1 x 1'. Next bend the paper clip to make the ribbed tube look bent. Finally cap the ribbed tube with the cone and put it onto the motor.
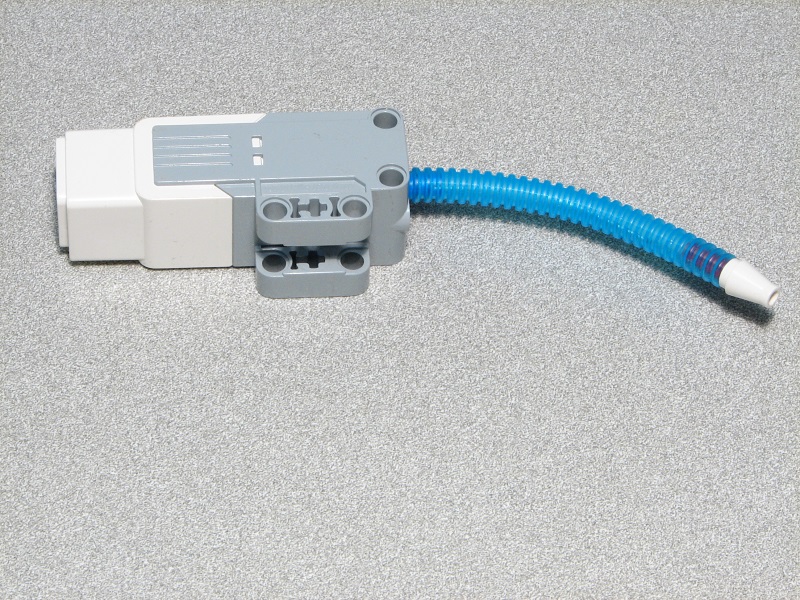
(After placing everything together is should look similar to the picture shown above.)
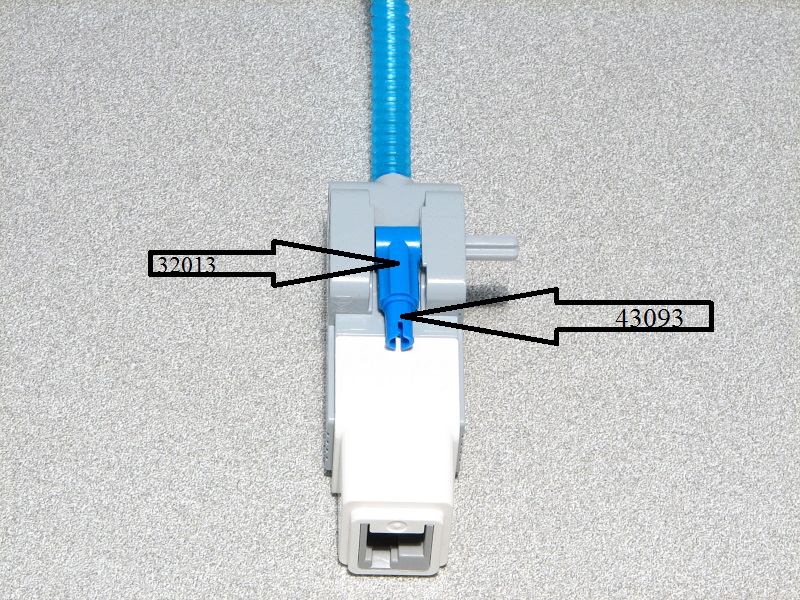
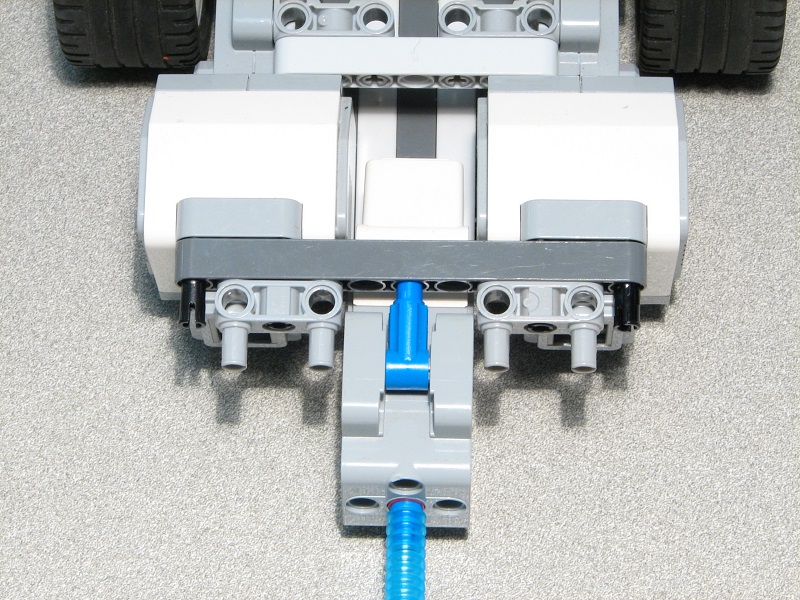
Step 19: On the bottom of the medium motor place the 'Technic Angle Connector #1' (32013) and slide the 'Technic Axle 3' (4519). Next using a 'Technic Axle Pin with Friction' (43093), place the axle part inside of the 'Technic Angle Connector #1' as shown in the picture above.
Step 20: Using the piece you create in steps 9, and 10. Place correctly on one of the Large Ev3 motors.
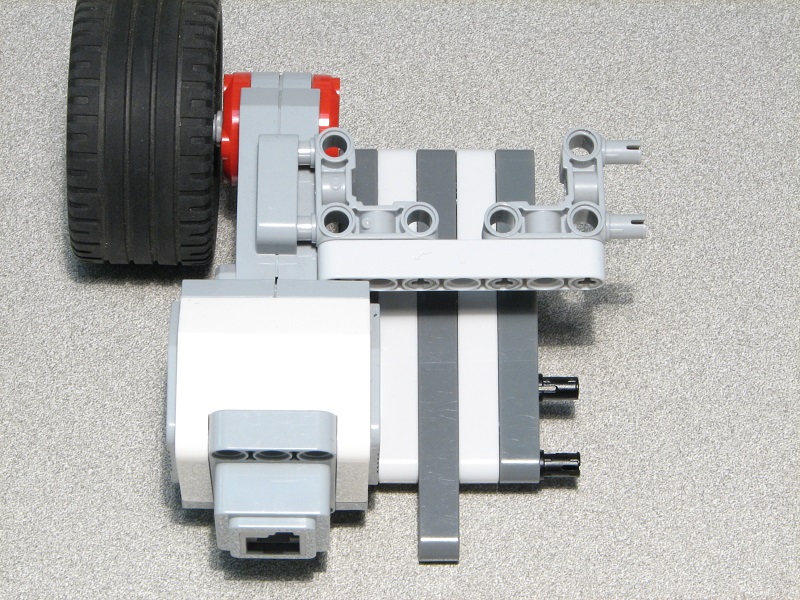
Step 21: Using the pice you created from step 11 turn the motor over and place the piece as shown in the picture.
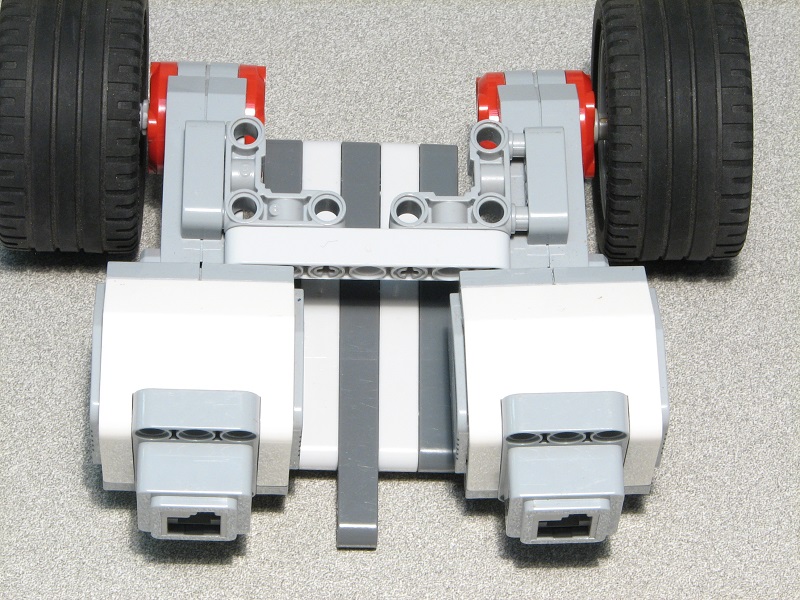
Step 22: Now place the 2nd Large EV3 Motor on the other side to look like the picture above.
Step 23: Connect the NXT cables to the motors and run them in between the motors.
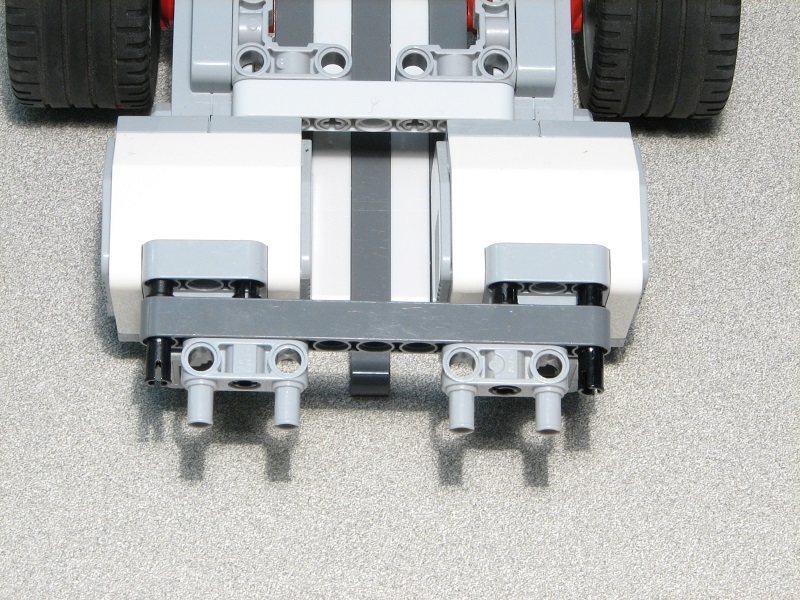
Step 24: Place the piece you created in step 6 to the back of the motors as shown above.
Step 25: Place the Medium Ev3 motor in the middle as shown above.
Step 26: Place the second piece you create in step 6 on the back/bottom of the large EV3 motors.
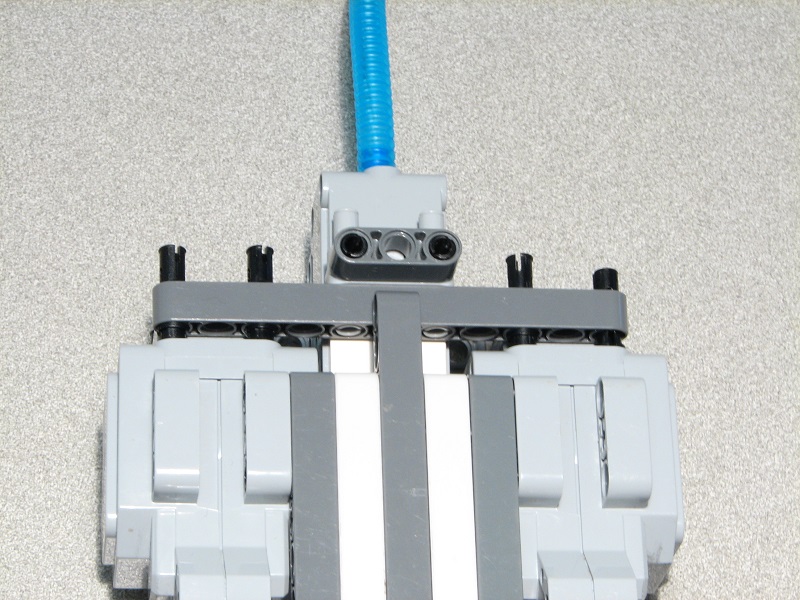
Step 27: Using a 'Technic Axle Pin with Friction', place the Ball caster on the previous;ly used piece.
Step 28: Now attach the piece you made in step 14 and connect as shown above.
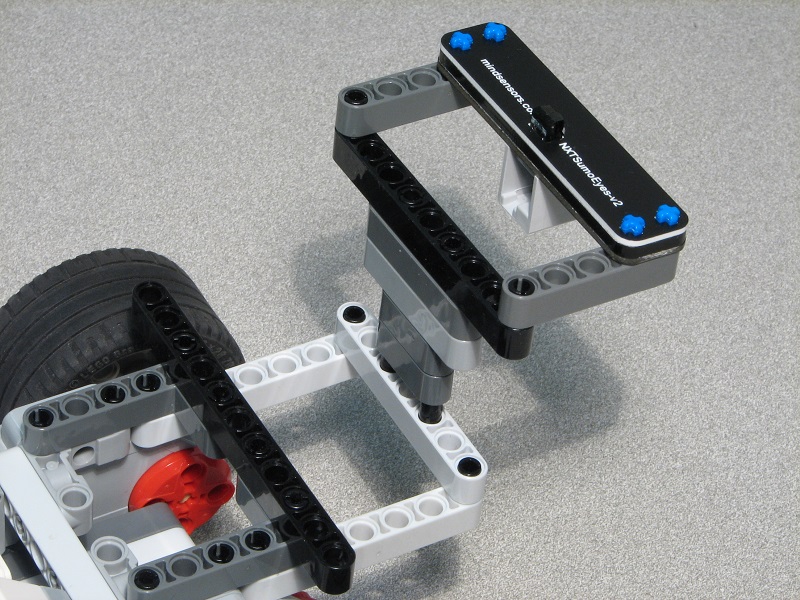
Step 29: Now attach the piece you created in step 16 as shown in picture above.
(Above is how your PyDog should currently look like)
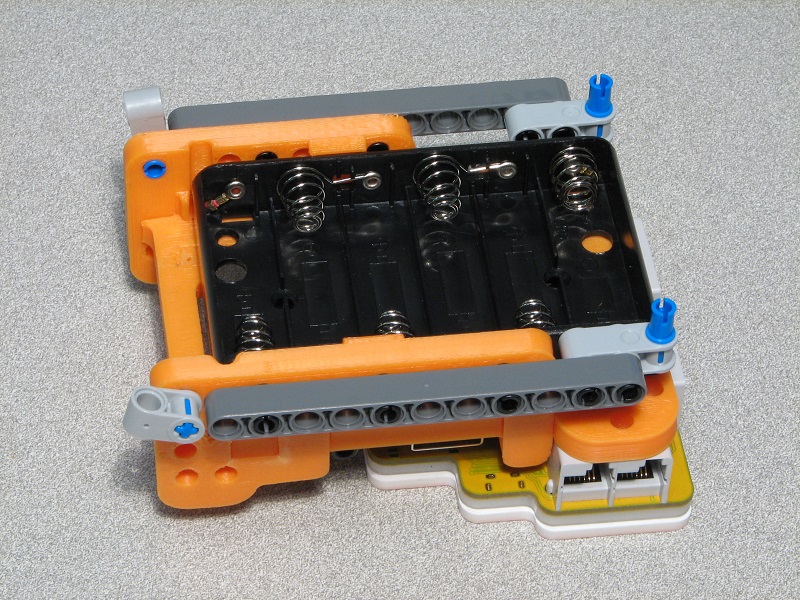
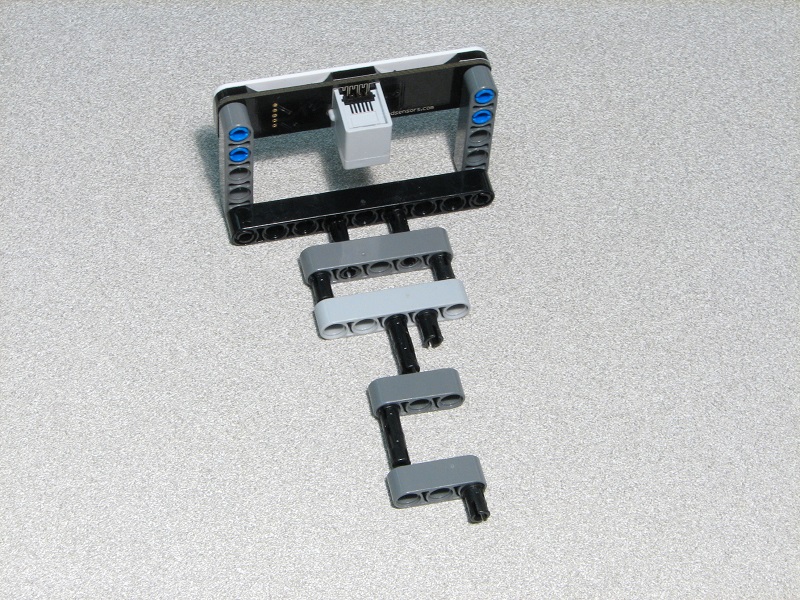
Step 30: We will now prepare the Pistorm and Raspberry Pi to be mounted. You will need 2x ' Technic Beam 11', 9x ''Technic Axle Pin with Friction', 2x 'Technic Axle joiner Perpendicular', 2x 'Technic Axle Joiner Perpendicular with 2 Holes', and 4x 'Technic Axle Pin with Friction'. Assemble as seen in the picture above.
Step 31: Insert 6 AA batteries.
Step 32: use the axle pin to push down the from on the PiStorms frame and then flip both latches closed on the back of the PiStorms as shown above.
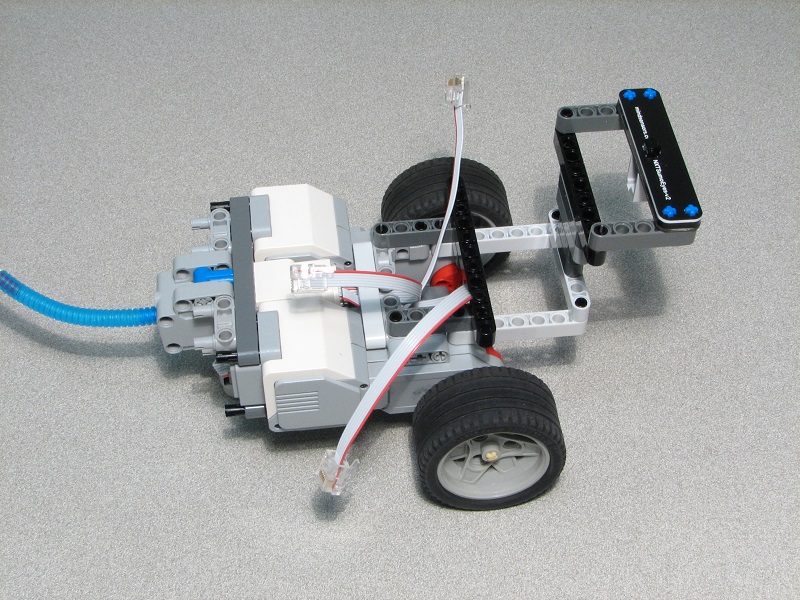
Step 33: Now just connect the NXT cable to the correct ports on the PiStorms. Left Motor should go to Bank B, Motor 1, Right motor should go to Bank A, Motor 1, and Medium center motor should go to Bank A, Motor 2. And the Nxt-SumoEyes should go to Bank B, Sensor port 2.
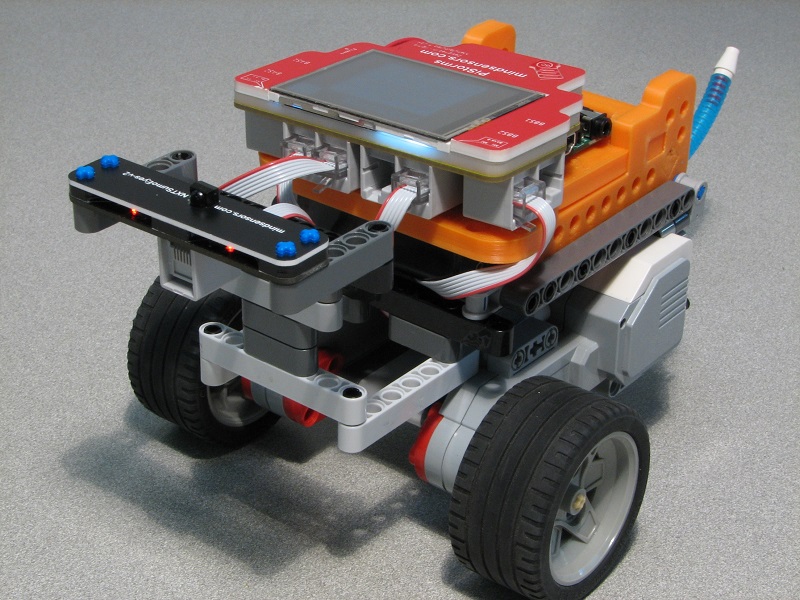
That is how you create PyDog, all you have to do now is press the "GO" button on the Raspberry Pi and select PyDog.

