Keeping plants healthy isn’t just about giving them water — it’s about giving them the right amount at the right...

How to install OpenCV on Raspberry Pi and do Face Tracking
How to install OpenCV on Raspberry Pi
To install OpenCV on Raspberry Pi, you need Raspberry Pi ( Pi2 preferably) , Pi camera, and internet connection to Raspberry Pi.
Begin with latest Raspberry Pi Image from https://www.raspberrypi.org/downloads/raspbian/
Copy this image to correct size SD Card. To do this correctly please refers the detailed instructions at https://www.raspberrypi.org/documentation/installation/installing-images/
Now since your SD card is ready, Boot your Pi. First thing you want to do is Enable Camera.
To do this run
sudo raspi-config
and chose Enable Camera (menu 6) also chose the correct speed for your Raspberry Pi from Overclock option (menu 8).
Reboot your Raspberry Pi. Now its is time to Install python wrapper for OpenCV, to do this run
sudo apt-get install python-opencv
sudo pip install imutils
Now we are almost done. Let's test the Pi camera connected to Raspberry Pi for proper operation. For this on command prompt run,
raspistill -o cam.jpg
The red light on the Pi camera will come on and a picture will be stored in cam.jpg file. Now we are all set to do some serious face tracking using Raspberry Pi. You can download the face tracking sample code using haar cascade from here.
You can run this code from Raspberry Pi command line.
python face_detect.py haarcascade_frontalface_default.xml
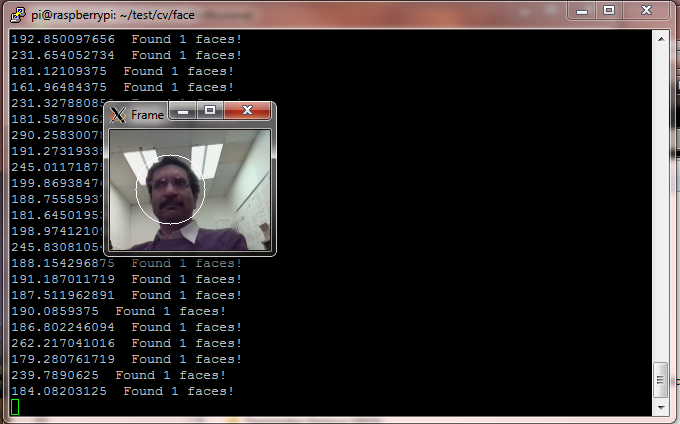
If the face is found in an image captured by camera, python program will print "Found 1 faces!." Below is brief description of how the code work.
- from picamera.array import PiRGBArray
- from picamera import PiCamera
- import time
- import cv2
- import sys
- import imutils
- # Get user supplied values
- cascPath = sys.argv[1]
- # Create the haar cascade
- faceCascade = cv2.CascadeClassifier(cascPath) # initialize the camera and grab a reference to the raw camera capture
- camera = PiCamera()
- camera.resolution = (160, 120)
- camera.framerate = 32
- rawCapture = PiRGBArray(camera, size=(160, 120))
This imports the required libraries and open the haar cascade file
Raspberry pi camera is intialized and the streme of images is collectd from camera one by one. Resolution is selected to be 162X120 for fast detection of faces.
- image = frame.array
- gray = cv2.cvtColor(image, cv2.COLOR_BGR2GRAY)
each image is picked from the camera and is loaded in nmupy array. Image is then converted to a grayscale image. This gray scale image is fed to facedetection alogorithm, with some minimum size setting
- faces = faceCascade.detectMultiScale(
- gray,
- scaleFactor=1.1,
- minNeighbors=5,
- minSize=(30, 30),
- flags = cv2.cv.CV_HAAR_SCALE_IMAGE
- )
- for (x, y, w, h) in faces:
- cv2.circle(image, (x+w/2, y+h/2), int((w+h)/3), (255, 255, 255), 1)
if any valid faces are found in image, function will return the list of faces with positions. We draw a white circle around each face and display results.


Leave a comment