Keeping plants healthy isn’t just about giving them water — it’s about giving them the right amount at the right...
Latest posts
-
 How to Measure Soil Moisture and Use It in Automatic Plant Watering Systemsread more
 -
 USB Driver installation instructions for NXTCam-v5read more
USB Driver installation instructions for NXTCam-v5
-
 How to attach rechargeable battery to PiStormsread more
How to attach rechargeable battery to PiStorms
-
 Connect to Wi-Fi Directly from PiStorms!read more
Connect your Raspberry Pi to a Wi-Fi network directly from PiStorms!
-
 Image Recognition Robot with PiStorms and Pi Cameraread more
Image Recognition Robot with PiStorms and Pi Camera
-

-
 Rotary Inverted Pendulum with PF-XL Motor and GlideWheel-Mread more
Rotary Inverted Pendulum with PF-XL Motor and GlideWheel-M
-

-
 Make Your Own Obstacle Avoidance Robot with SumoEyesread more
Make Your Own Obstacle Avoidance Robot with SumoEyes
-

Blog categories
Search in blog

How to attach rechargeable battery to PiStorms
Prepare PiStorms
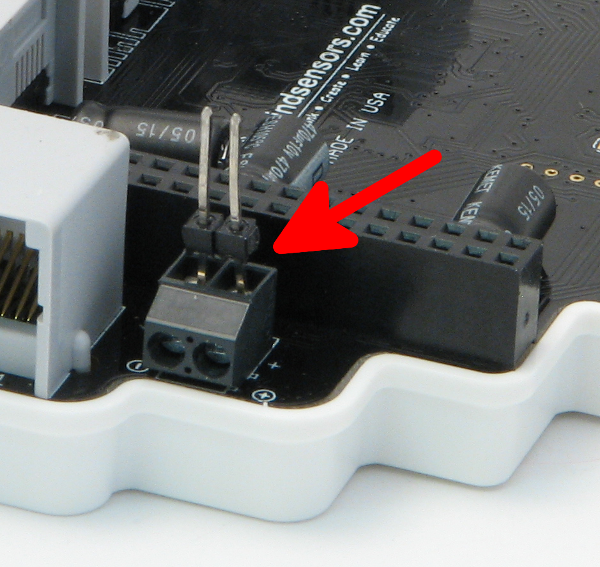
Attach Pins to PiStorms Power Terminal and fasten the screws
Attach PiStorms to Frame
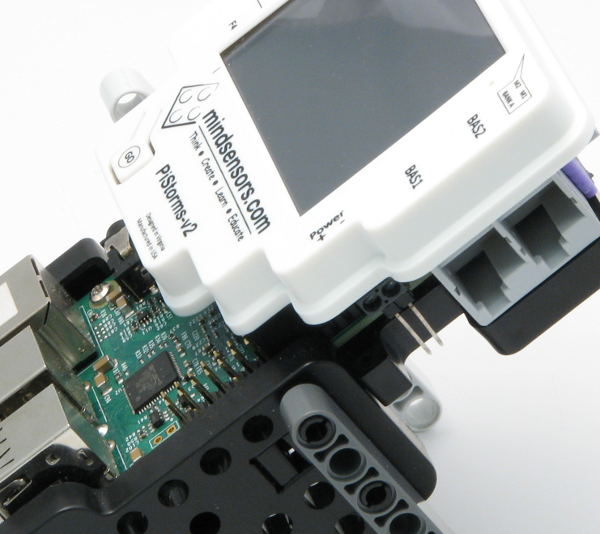
Attach Pi to your Frame with screws and attach PiStorms on its GPIO pins.
Attach Battery PCB to PiStorms
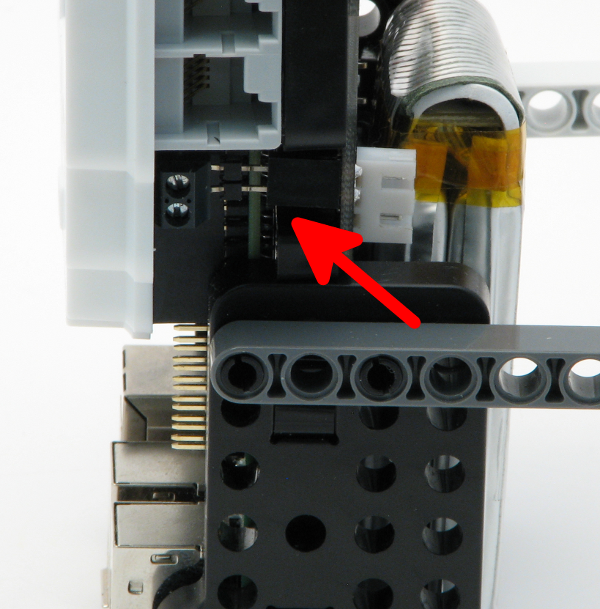
Attach Battery PCB on the back, ensure to engage the power pins correctly.
Fasten the PCB with screws

Fasten the PCB with screws.
Attaching charging adapter
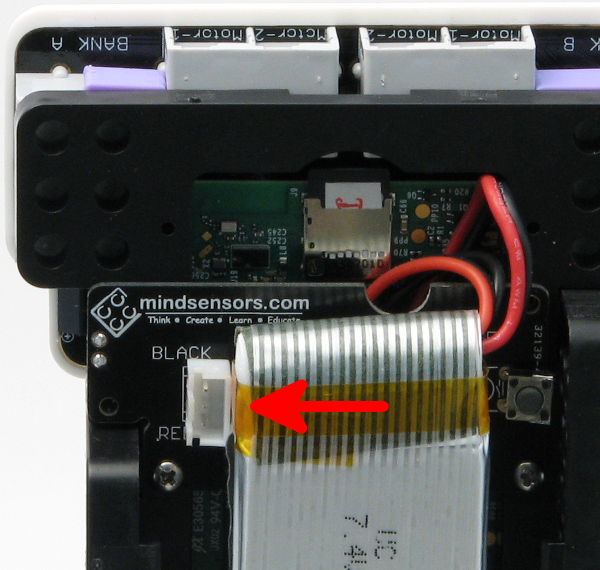
Attach your charging adapter to the socket on the board, as in picture below:
WarningKeep Battery charged at regular intervals. Do not allow battery to over-discharge. Over discharged battery may damage and will not hold charge any more. If charging is attempted, it may swell or explode. Do not attempt to charge a damaged battery. Battery can over discharge if not charged for extended period. |
Notes
The charger circuit cuts-off the charging when the battery is full.
If you are using this for desk use, you can keep the charging adapter connected, (that way, the battery is being charged while it is being used). You can then disconnect the charging adapter wire when you want to run your robot.
It is recommended to keep the battery charged at all times.
If the battery has completely discharged or pressing the GO button does not turn it on, click the reset button. It is on the back of the battery pack, to the right of the battery pack.
The charger will show three green LEDs if nothing is connected. If you do see three green lights, please ensure the charger is correctly connected to be sure the battery is fully charged.
Please read the user guide to take good care of your battery.
Related posts
-
 Line Following Robot with LightSensorArray or LineLeader
read more
Line Following Robot with LightSensorArray or LineLeader
Line Following Robot with LightSensorArray or LineLeaderread more -
 Attach Mulitple Sensors to a Single EV3 Port
EV3 Sensor Adapter with SPLIT-Nxread more
Attach Mulitple Sensors to a Single EV3 Port
EV3 Sensor Adapter with SPLIT-Nxread more -
 Vision for your PiStorms Robot using Pi Camera!
read more
Vision for your PiStorms Robot using Pi Camera!
Vision for your PiStorms Robot using Pi Camera!read more -
 How to install OpenCV on Raspberry Pi and do Face Tracking
read more
How to install OpenCV on Raspberry Pi and do Face Tracking
How to install OpenCV on Raspberry Pi and do Face Trackingread more -
 How to Upgrade PiStorms Firmware
read more
How to Upgrade PiStorms Firmware
How to Upgrade PiStorms Firmwareread more
Leave a comment