
Calibrate SD540B
The SD540B motor controller was designed for use in FRC robots. However, the SD540B can be used with many different platforms in which a PWM is used to drive a motor. This device comes pre-calibrated for use with the RoboRIO controller from National Instruments If you intend to use it with other controllers, calibration may be required.
If you are using SD540B with the RoboRIO DO NOT Calibrate unless previously calibrated for another platform. The SD540B is already calibrated for the RoboRIO. FRC teams will spend unneeded time and effort performing this task. If calibration is not performed correctly the SD540B can lose some or all functionality in one direction.
To calibrate the SD540B you will need to make sure the SD540B has the most recent firmware. Follow the instructions here to flash the with an Arduino UNO.
Calibration
This calibration program was written in LabView 2015 with the FRC 2016 update. It is required to use the RoboRIO and FRC Driver Station to calibrate the SD540B with this method.
Step 1: Wire your SD540B to the RoboRIO PWM 0.
Step 2: Power on the RoboRIO and connect 12V power to the SD540B, pay close attention to polarity (red to red, black to black)
DO NOT connect motor; if a motor is already wired to the SD540B please remove it now.
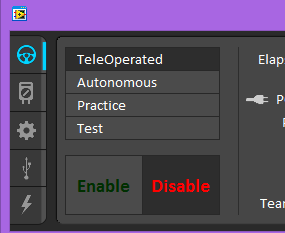
Step 3: Start the FRC Driver Station and establish connection with the RoboRIO.
Step 4: Open SD540 Calibration.lvproj with LabView.
Step 5: Connect the RoboRIO target.
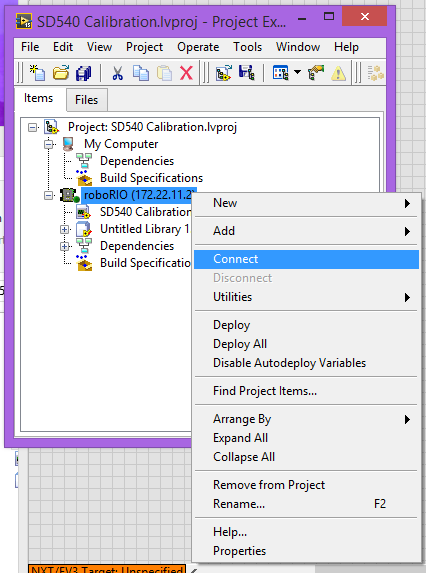
Step 6: Open SD540 Calibration.vi.
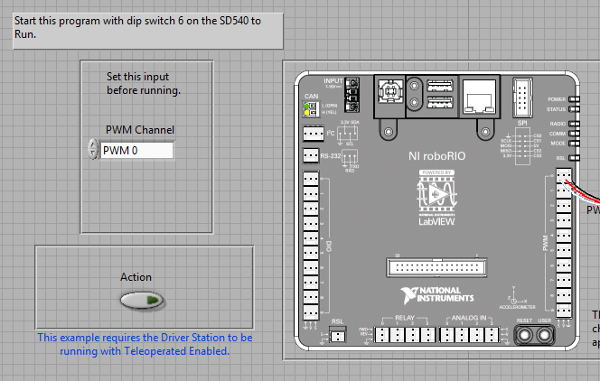
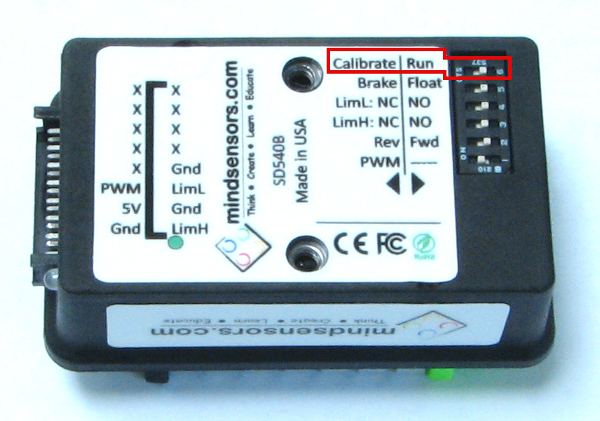
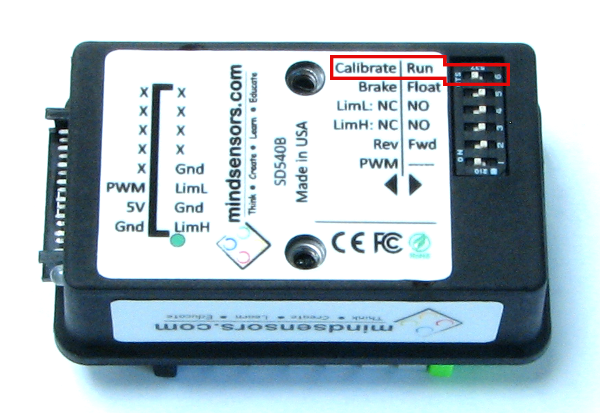
Step 7: Ensure that dip switch 6 on the SD540B is set to 'Run'.
Step 8: Start the program by clicking the right arrow on the top left hand corner of the LabView Front Panel.
Step 9: Enable Teleop mode ont he FRC Driver Station.
Step 10: When prompted, move dip switch 6 to 'Calibrate'.
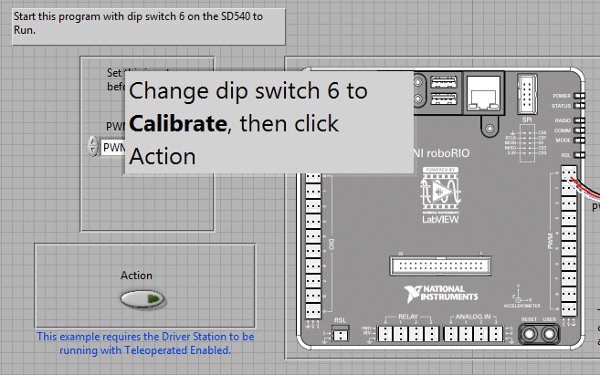
Step 11: Click the Action button on the LabView Front Panel.
After approximately 10 seconds you will be prompted again.
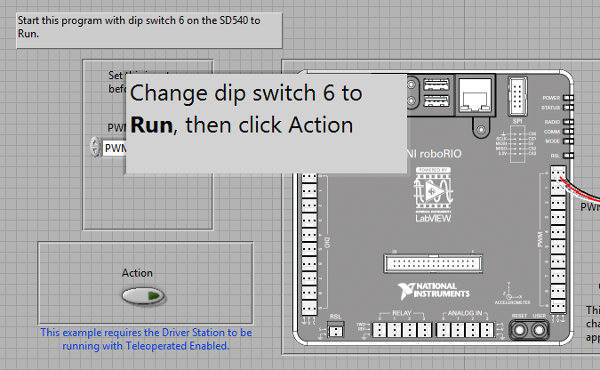
Step 12: Follow the on screen instructions and move dip switch 6 to 'Run'.
Step 13: Click the Action button on the LabView Front Panel.
The program will end.
Step 14: Remove the 12V power from the SD540B and then reconnect power, again pay close attention to polarity.
The SD540B is now properly calibrate for use with the RoboRIO.
Testing
To test the calibration, attach a motor to the SD540B. Ensure the motor can run freely without obstruction. Run the calibration program again keeping dip switch 6 in the 'Run' position for the entire program. Click the Action button when prompted. The Motor should run full speed forward, full speed reverse, then stop. If you motor does not perform as intended, please verify that the SD540B has the most recent firmware and perform the calibration process again.

