Keeping plants healthy isn’t just about giving them water — it’s about giving them the right amount at the right...
Latest posts
-
 How to Measure Soil Moisture and Use It in Automatic Plant Watering Systemsread more
 -
 USB Driver installation instructions for NXTCam-v5read more
USB Driver installation instructions for NXTCam-v5
-
 How to attach rechargeable battery to PiStormsread more
How to attach rechargeable battery to PiStorms
-
 Connect to Wi-Fi Directly from PiStorms!read more
Connect your Raspberry Pi to a Wi-Fi network directly from PiStorms!
-
 Image Recognition Robot with PiStorms and Pi Cameraread more
Image Recognition Robot with PiStorms and Pi Camera
-

-
 Rotary Inverted Pendulum with PF-XL Motor and GlideWheel-Mread more
Rotary Inverted Pendulum with PF-XL Motor and GlideWheel-M
-

-
 Make Your Own Obstacle Avoidance Robot with SumoEyesread more
Make Your Own Obstacle Avoidance Robot with SumoEyes
-

Blog categories
Search in blog

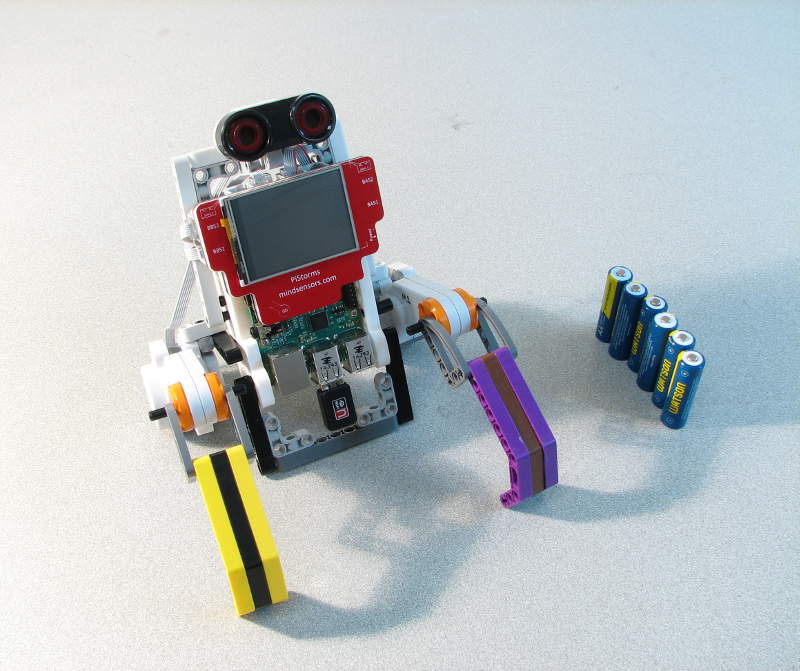
Sam the Emotional Robot
Sam
When powered on, Sam will calmly greet you. However, Sam scares very easily. Move closer to Sam and he will throw up his arms and fear will consume his face. Once the initial shock subsides and Sam calms down, he will put down his arms and become happy once again.
Want to Build Sam?
At the core, Sam employs a Raspberry Pi, PiStorms, and serveral Lego bits and pieces. In this demo, EV3 motors and sensors are used alongside the touchscreen interface to provide a smart and interactive link from human to robot.
For those technically inclined, Sam uses his ultrasonic sensor to detect when something is too close to him. Motors on either side of his body jerk backward at full speed to show his startled emotions. His face (a small touchscreen display) shows a small image of a scared emoticon until the fear dwindles and he is calm again. His face is cleared and his arms lower back down to his sides. He sits unknowingly, awaiting the daunting attack of the next object to approach him.
If you want to build your own Sam to accompany you, the DIY instructions are listed below.
The along with python code.
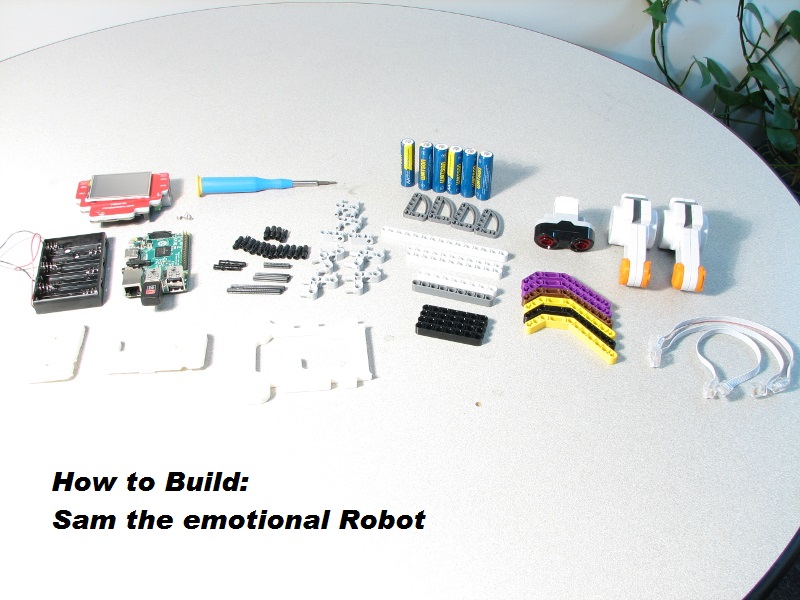
Parts List:
-
PiStorms
-
PiStorms Frame
-
4 - Mounting Screws
-
Battery Box - 6 AA
-
Raspberry Pi - A, B, or B+
LEGO Parts:
- 16 - Connector Peg
-
6 - Double Angular Beam - Assorted Colors
-
4 - Technic 7M Beam
-
4 - Technic 5x3 Angular Half Beam
-
4 - Right Angle Peg Connector
-
3 - LEGO Mindstorms Cables - EV3 or NXT
-
2 - Straight Peg Connector
-
2 - LEGO Mindstorms Motors - EV3 or NXT
-
2 - 90 Degree 2M Cross Block
-
2 - Technic 11M Beam
-
2 - Technic 9M Beam
-
2 - 3M Connector Peg
-
2 - 4M Cross Axle
-
2 - 6M Cross Axle
-
2 - Double Cross Block
-
1 - 3M Cross Axle
-
1 - Technic 15M Beam
- 1 - LEGO Mindstorms EV3 Ultrasonic Sensor
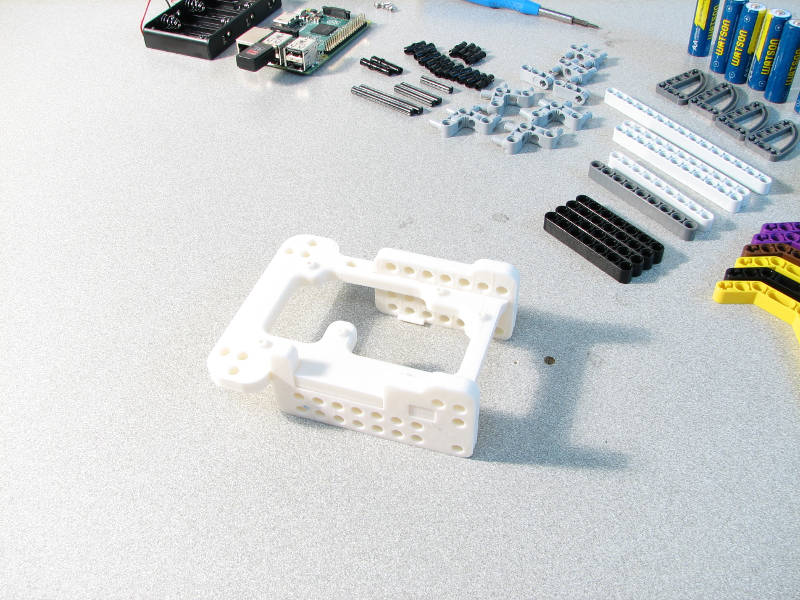
Step 1:
- Assemble the PiStorms Frame
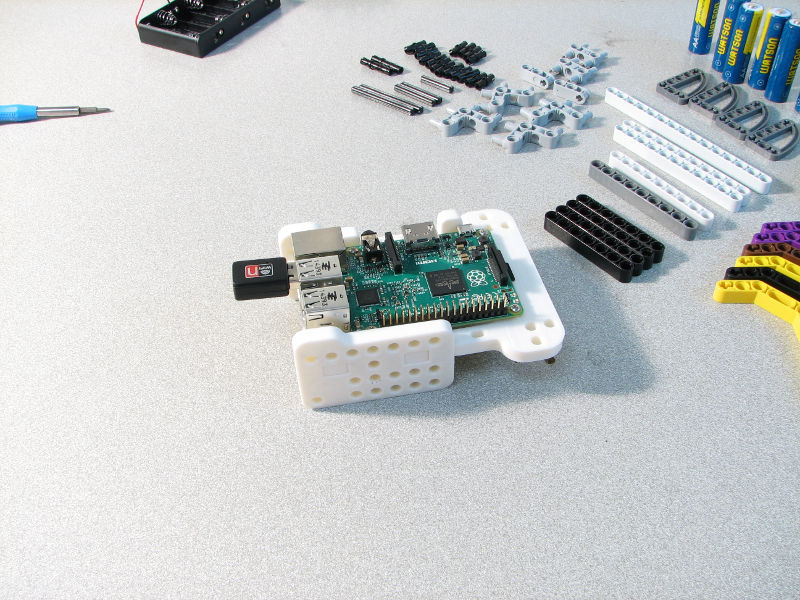
Step 2:
- Mount the Raspberry Pi using mounting screws
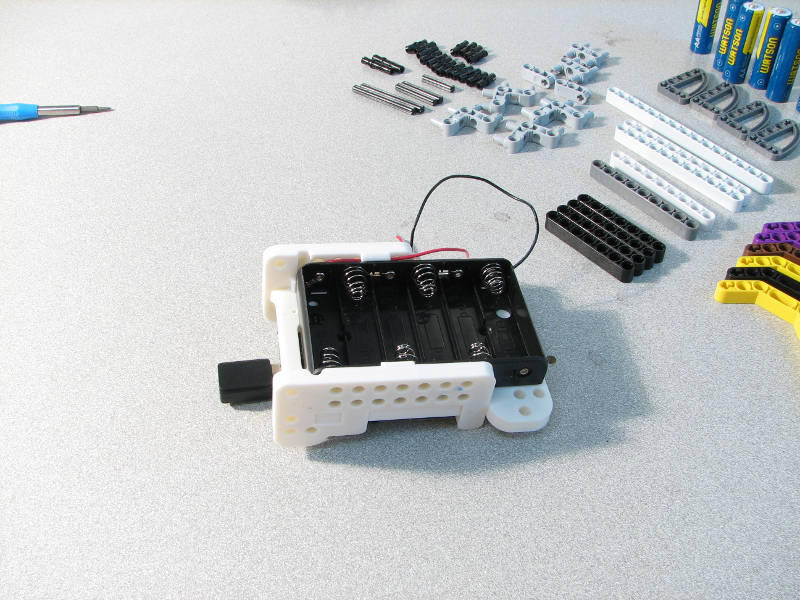
Step 3:
- Slide battery pack into the PiStorms Frame
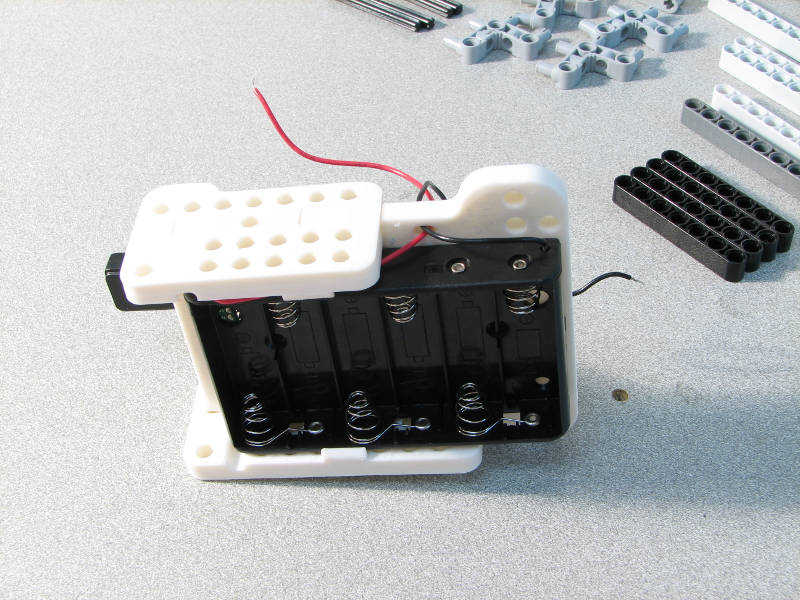
- Make sure to feed the wires through the battery pack hole
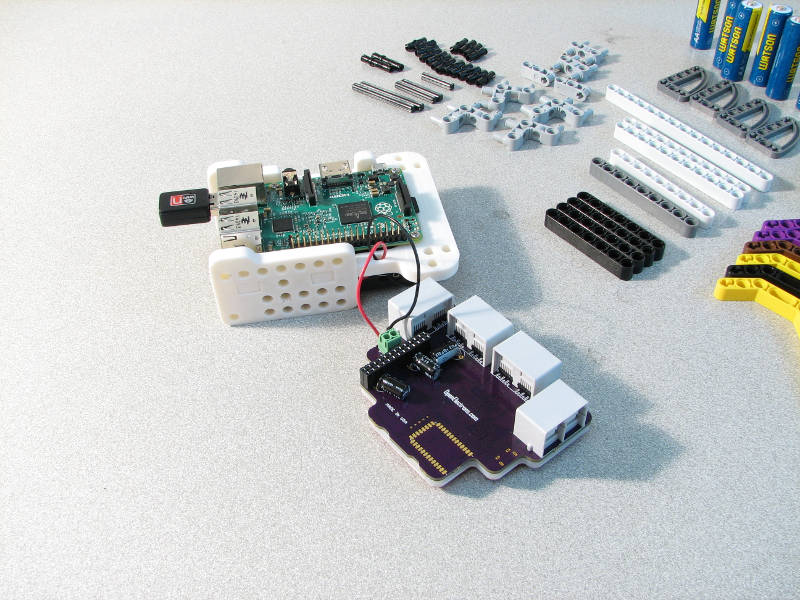
Step 4:
- Attach power wires to PiStorms
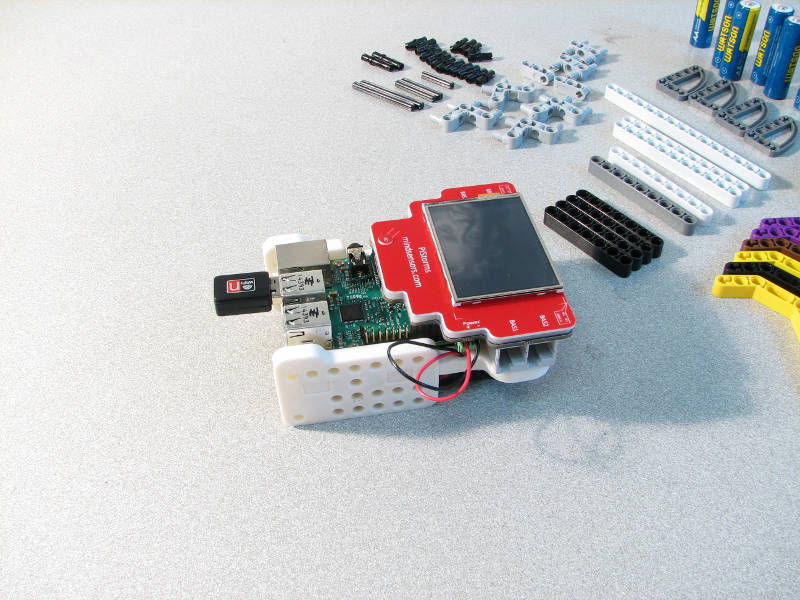
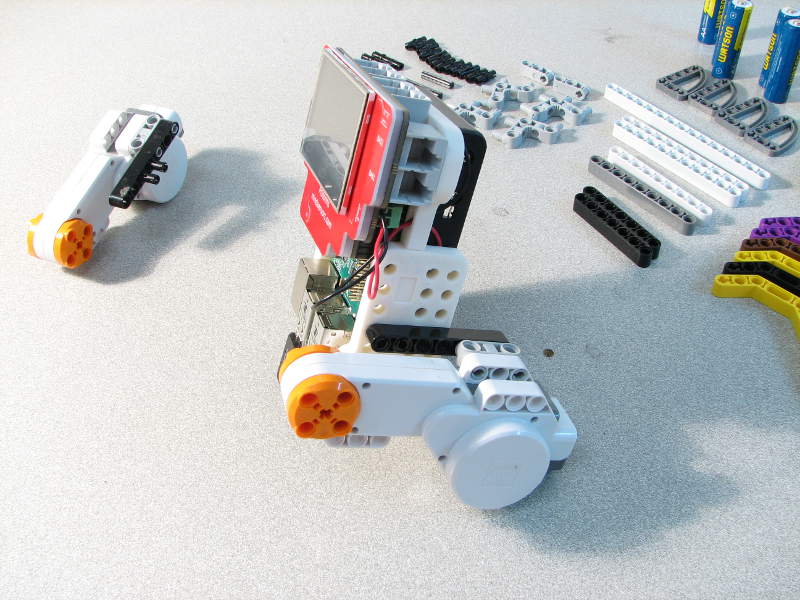
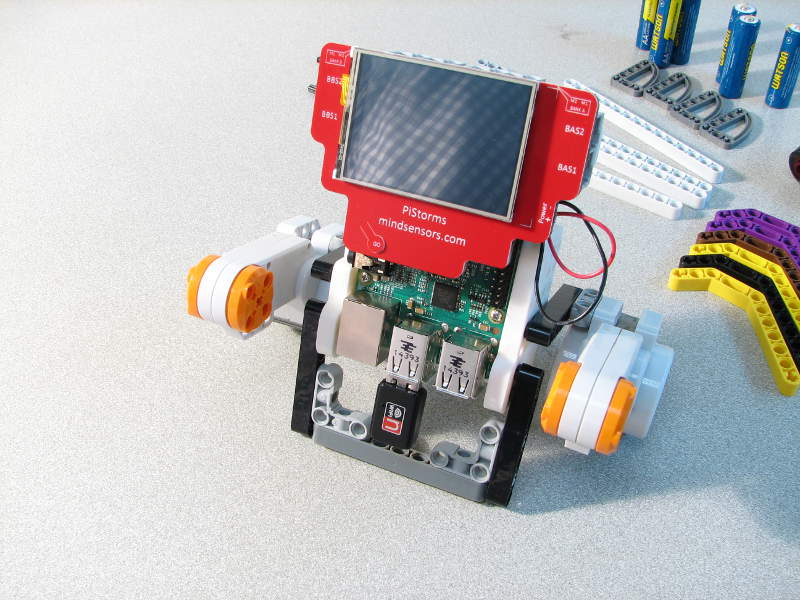
Step 5:
- Place PiStorms onto the Raspberry Pi. The pins line up with the first row on the Raspberry Pi
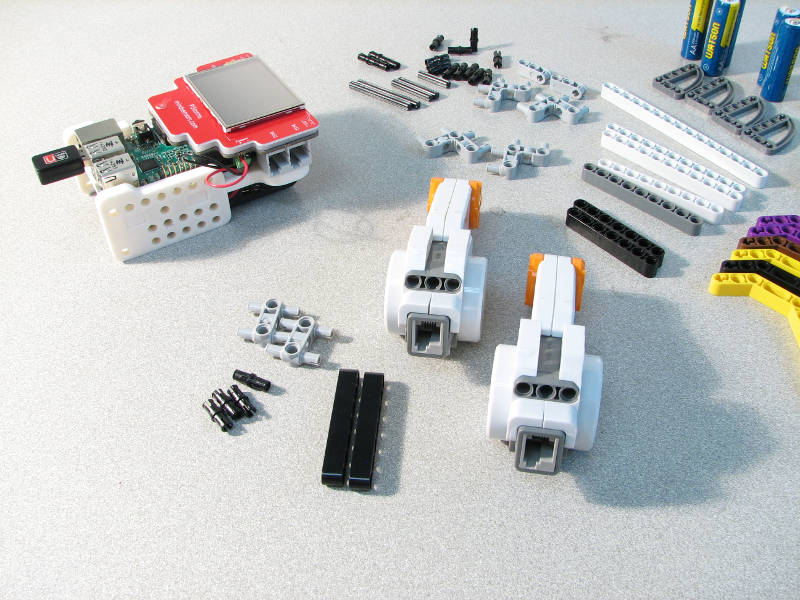
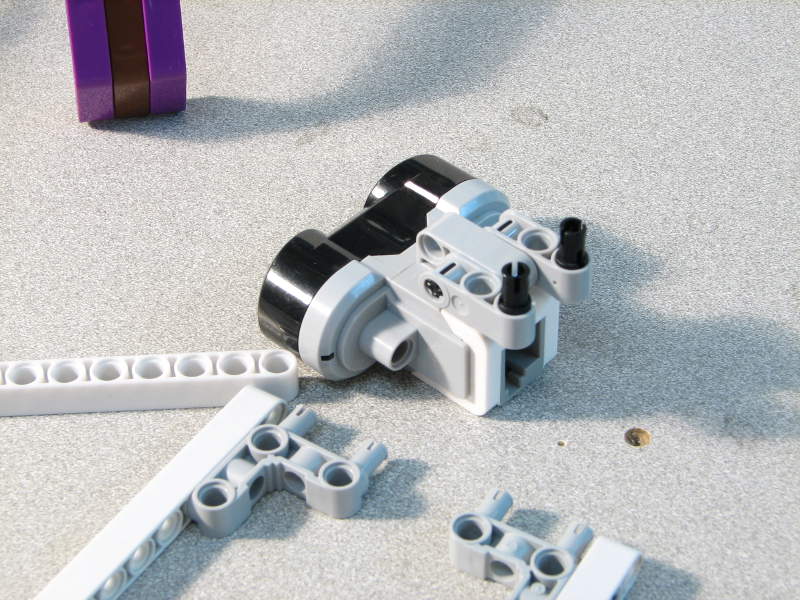
Step 6:
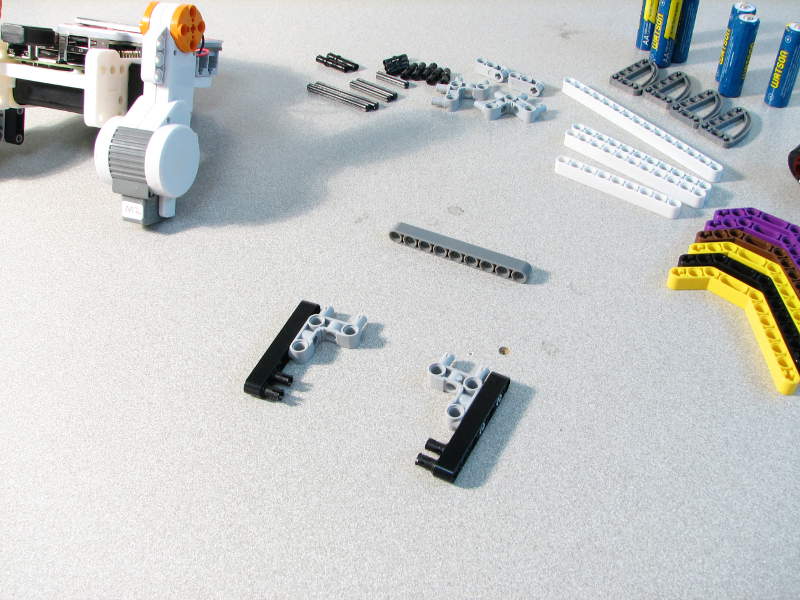
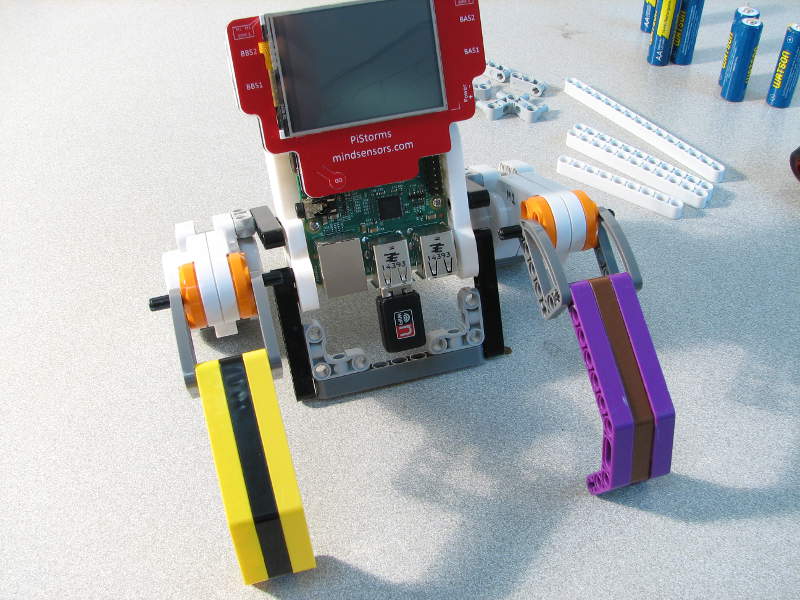
- Assemble the two motor pieces
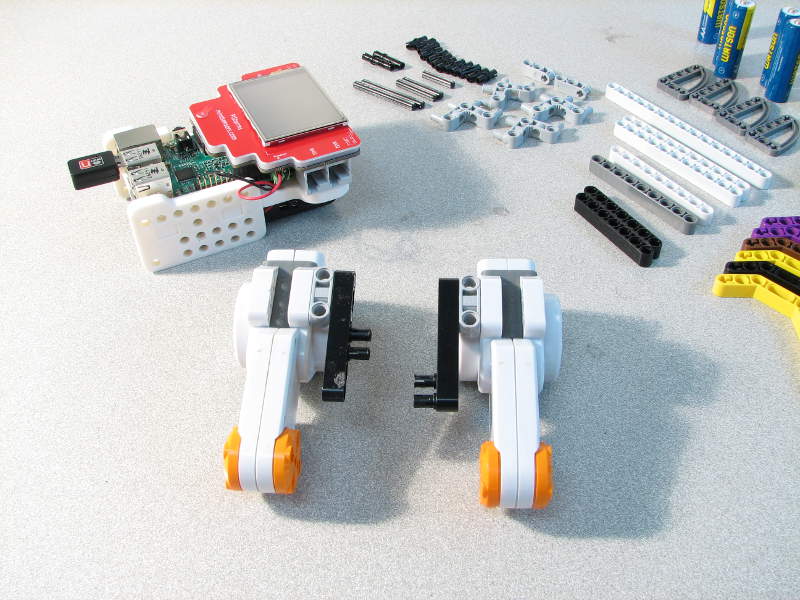
- Careful, each side is different
- Align it properly (left side of PiStorms)
- (right side)
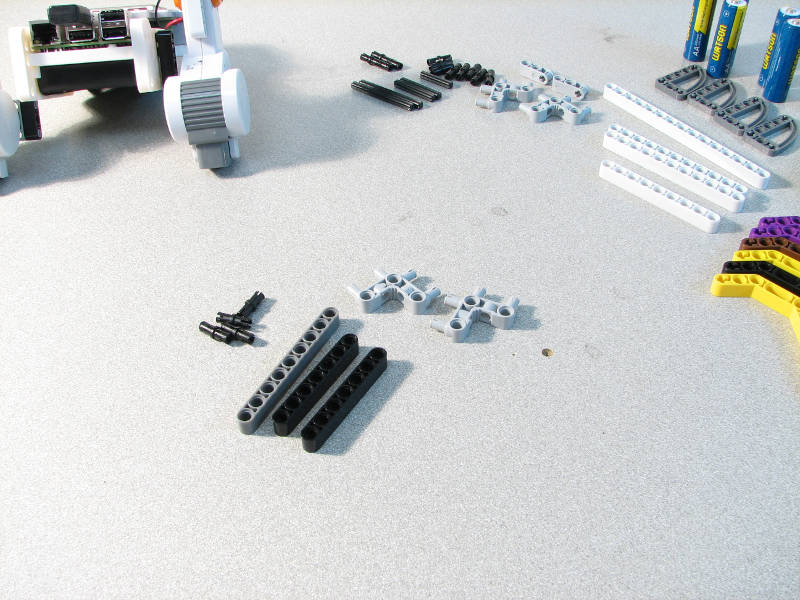
Step 7:
- The lower support structure. This protects the wi-fi adapter and Raspberry Pi from any damage. It also props Sam up a little bit on the desk
- The grey beam will go on the end in a second
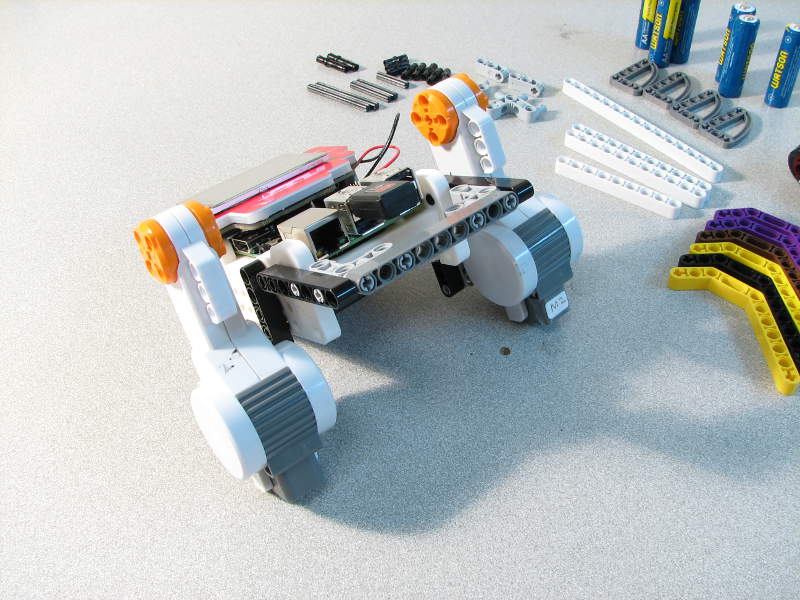
- After attaching the two black beams, place the gray one on the end
- Done!
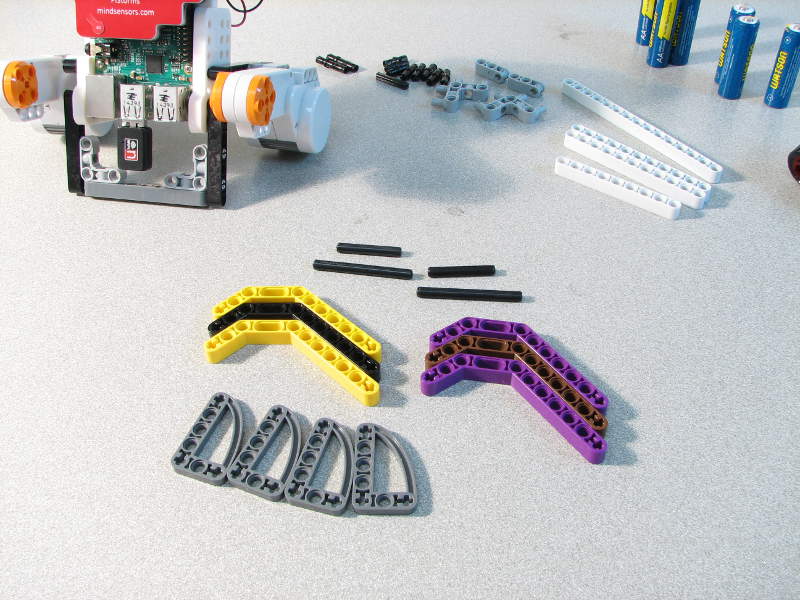
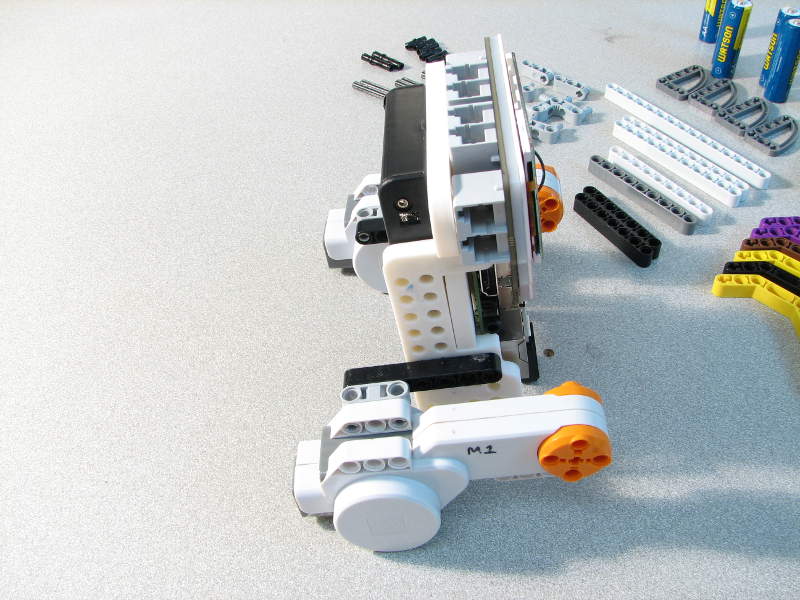
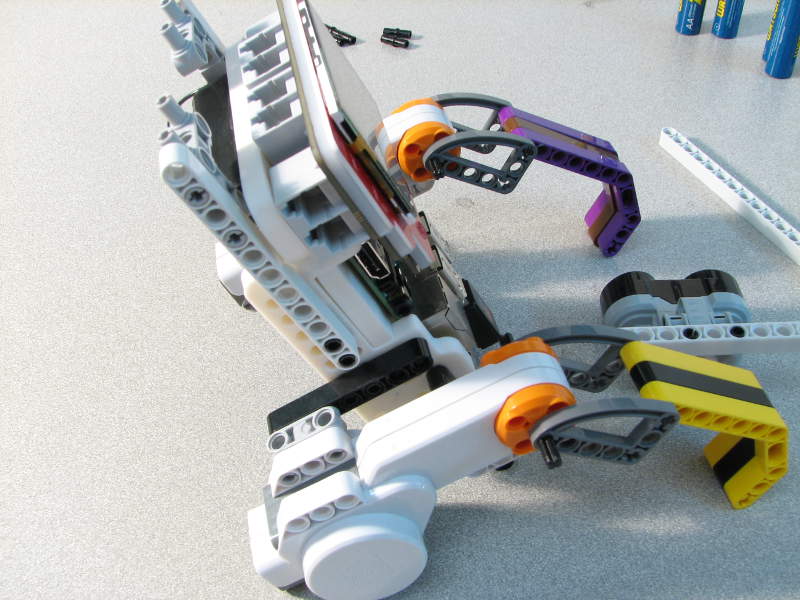
Step 8:
- Now to build Sam’s hands
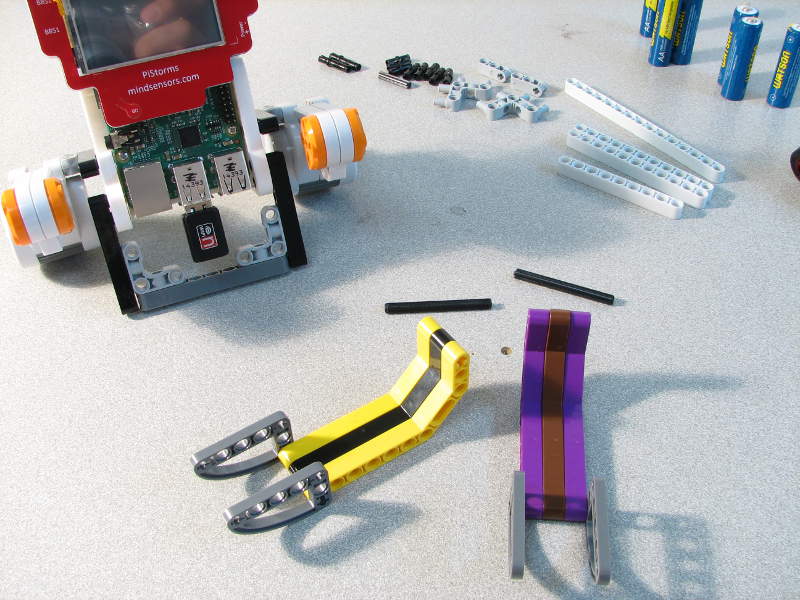
- Each one is connected using the smaller cross beam through the back of the hand
- Then connect the two hands back to the motors with the other axle beams
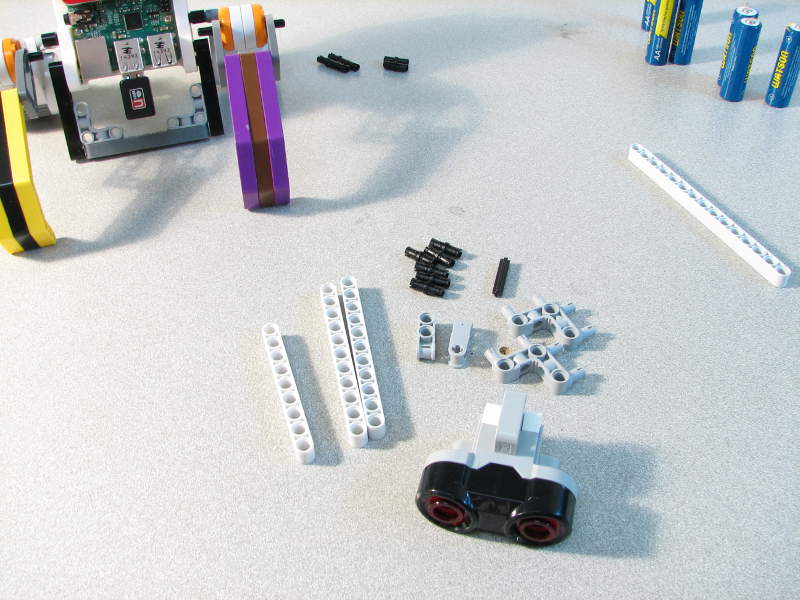
Step 9:
- Let’s give Sam a head
- The support structure for the ultrasonic sensor looks very similar to the lower support structure

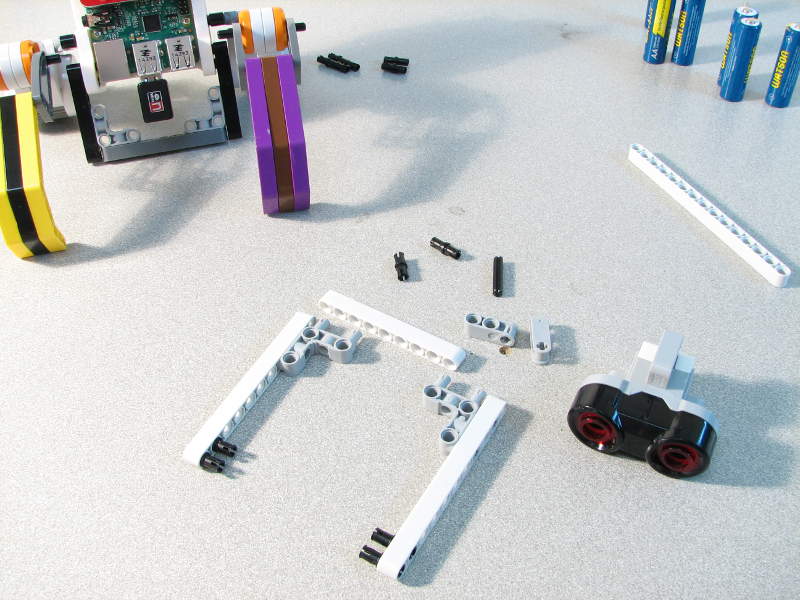
- Easy assembly for the ultrasonic sensor. A cross axle hold the ultrasonic sensor between the two 90 degree

- Attach the left support beam…
- ...then the right
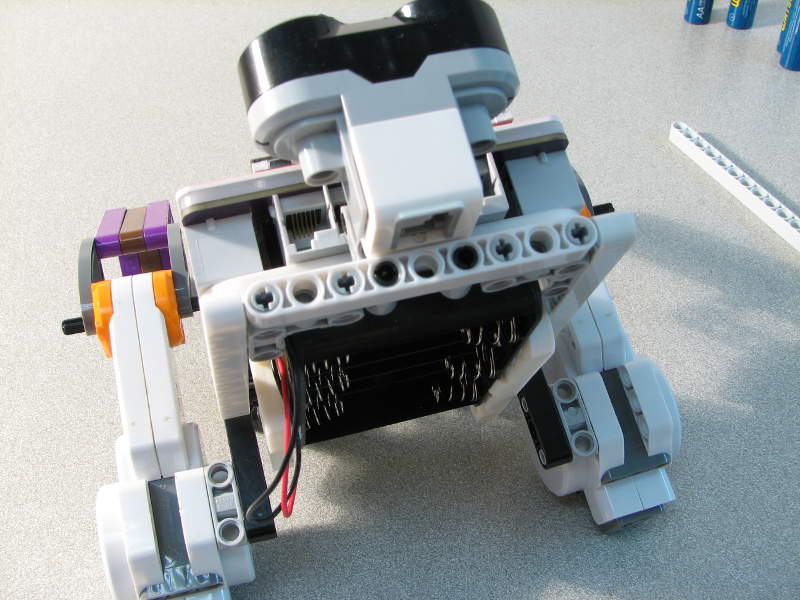
- Place the ultrasonic sensor atop the support beams
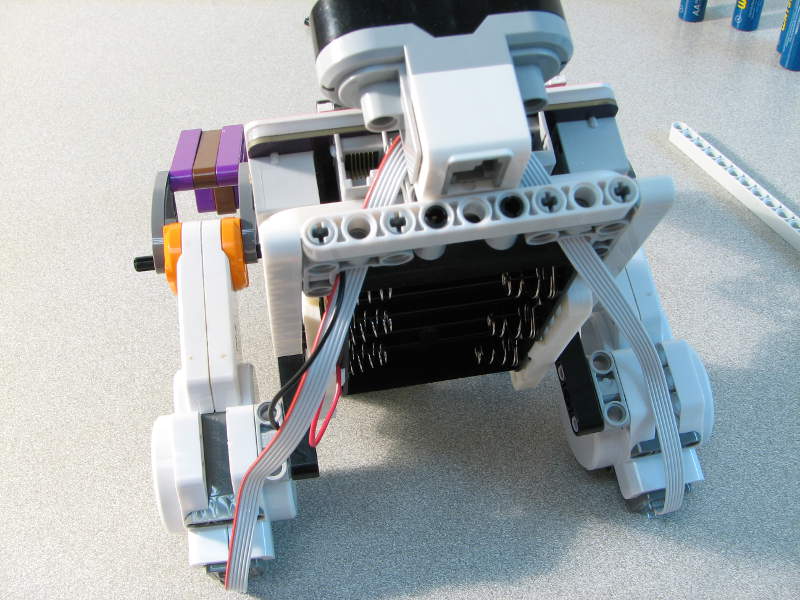
Step 10:
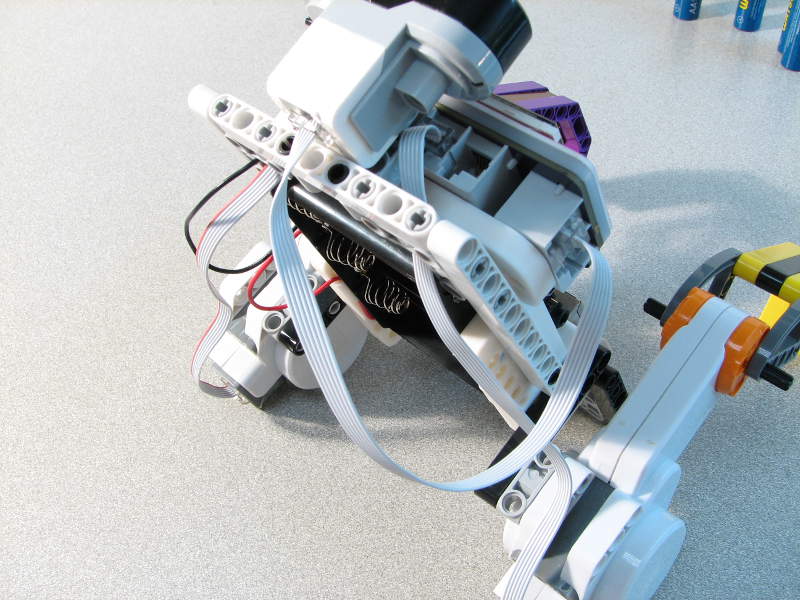
- Add your wires
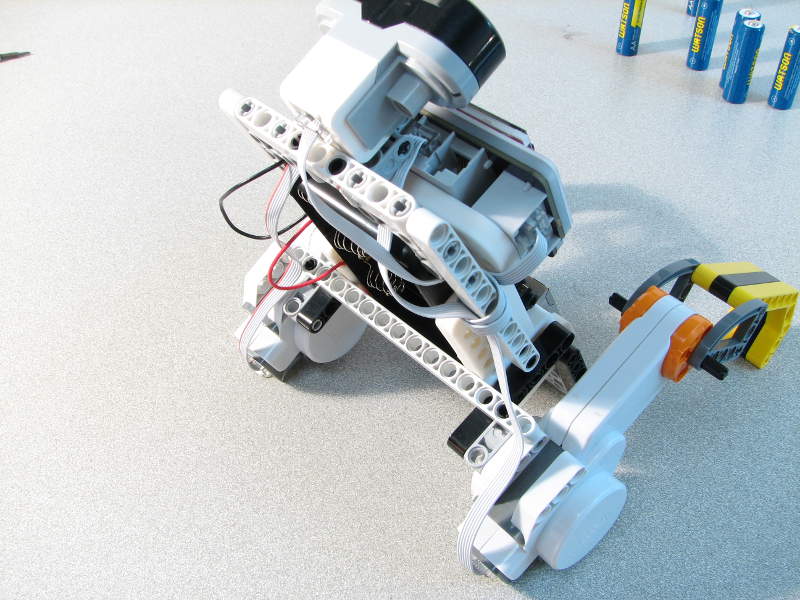
- I cleaned up the wires, and added a long beam to support the back
- All you have to do is pop the batteries in and he’s alive!!!
Related posts
-
 Line Following Robot with LightSensorArray or LineLeader
read more
Line Following Robot with LightSensorArray or LineLeader
Line Following Robot with LightSensorArray or LineLeaderread more -
 Attach Mulitple Sensors to a Single EV3 Port
EV3 Sensor Adapter with SPLIT-Nxread more
Attach Mulitple Sensors to a Single EV3 Port
EV3 Sensor Adapter with SPLIT-Nxread more -
 Vision for your PiStorms Robot using Pi Camera!
read more
Vision for your PiStorms Robot using Pi Camera!
Vision for your PiStorms Robot using Pi Camera!read more -
 How to install OpenCV on Raspberry Pi and do Face Tracking
read more
How to install OpenCV on Raspberry Pi and do Face Tracking
How to install OpenCV on Raspberry Pi and do Face Trackingread more -
 How to Upgrade PiStorms Firmware
read more
How to Upgrade PiStorms Firmware
How to Upgrade PiStorms Firmwareread more
Leave a comment